Sesame-filled half-moon rice cakes (songpyeon)
Knead moist non-glutinous rice flour with hot water, enclose a sweet sesame filling and steam sixteen white half-moon cakes. This home version uses a clean cloth-lined steamer instead of pine needles. Four snack portions of four cakes, about 95 minutes.

Ingredients
4 servings

Everyday kitchen measurements
For 4 servings. Use a small 180 ml paper cup, a level eating spoon (about 15 ml) and a small teaspoon (about 5 ml).
How to fill the cup and spoons
Use the same cup and spoons throughout. Their sizes vary, so these amounts are approximate. Spoon flour in loosely and level the top without pressing. Measure vegetables after chopping, without packing them down. The amounts in g/ml are the original reference quantities. For part of a pack, use the specified pack weight and divide the contents evenly.
King Arthur Baking-
Essential
Required for this recipe; use the listed amount.
-
Essential
Required for this recipe; use the listed amount.
-
Essential
Required for this recipe; use the listed amount.
-
Essential
Required for this recipe; use the listed amount.
-
Essential
Required for this recipe; use the listed amount.
-
Substitute available
If Honey is unavailable
- Use instead
- Rice syrup
- Substitute quantity
- 2 teaspoons (14 g)Reference quantity: 14 g
If honey is unavailable, use 2 teaspoons rice syrup weighed to 14 g in the same filling-mixing step. Keep the sesame seeds and sugar unchanged, and use the same shaping and steaming times. The filling has less honey aroma; choose a thick syrup so it remains crumbly enough to enclose.
-
Optional
May be omitted without changing the other quantities.
-
Essential
Required for this recipe; use the listed amount.
-
Essential
Required for this recipe; use the listed amount.
Tap each ingredient as you prepare it. Check product labels for egg, soy, sesame, wheat, fish or shellfish where relevant.
Step-by-step cooking
Check off a completed step to move to the next one. After the last step, you will move to the finished dish.
Completed steps are saved in this browser. Start over to clear this recipe’s progress.
-
Step 1
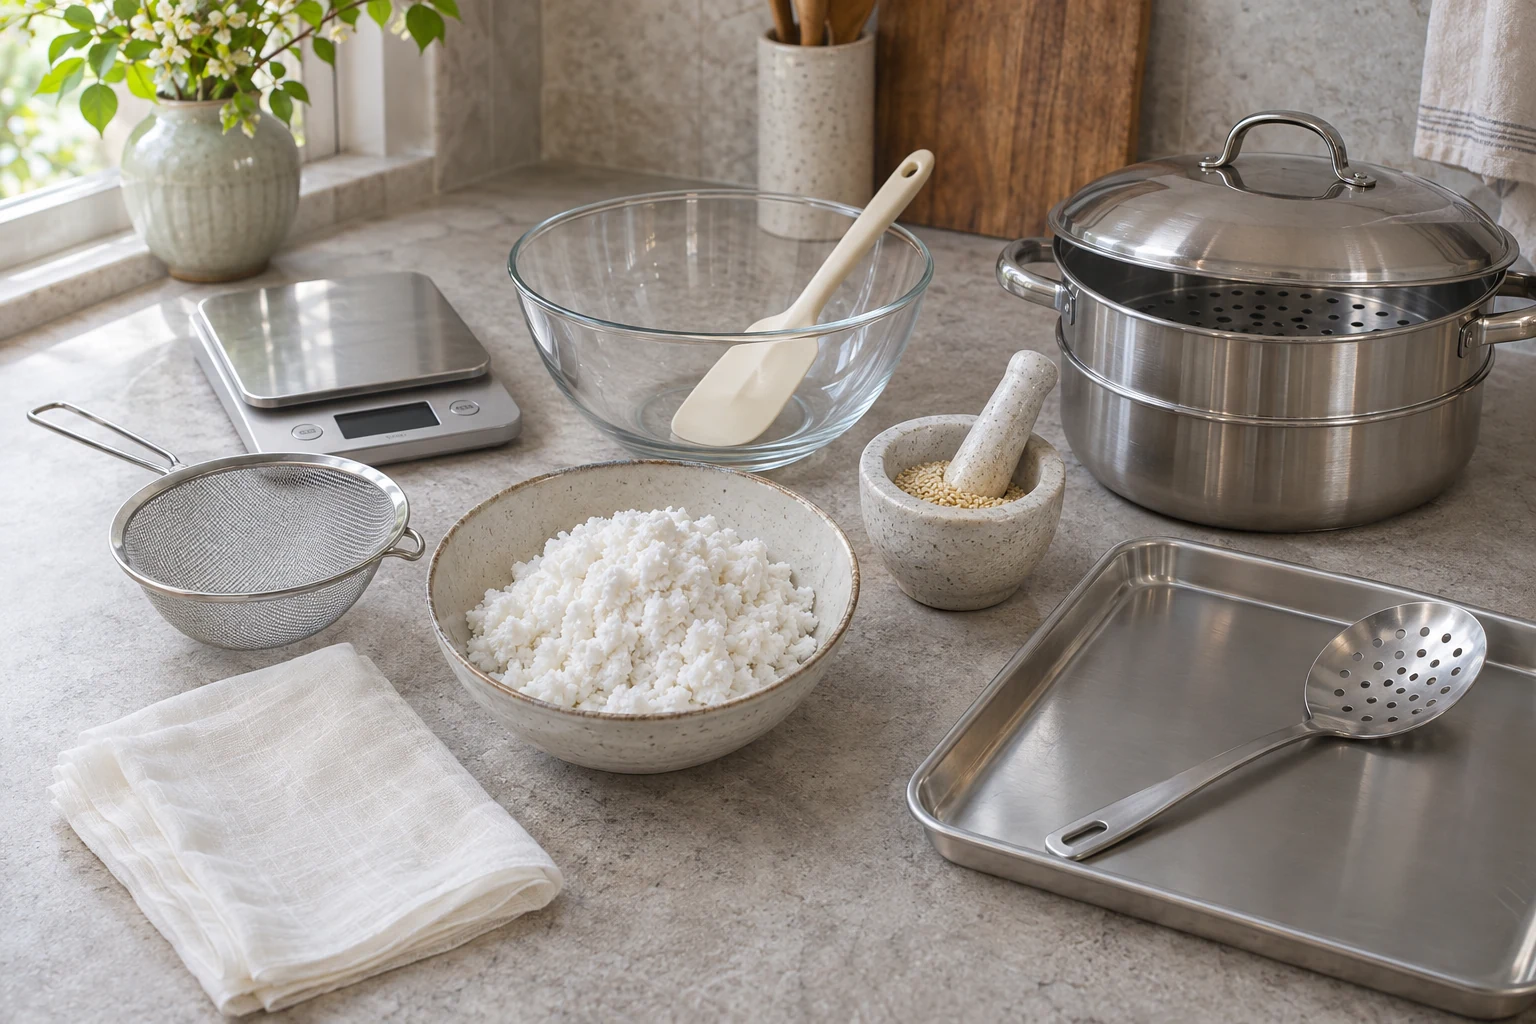
Plan about 25 minutes preparation, 15 minutes dough rest, 20 minutes shaping, 25 minutes steaming, 5 minutes covered rest and 5 minutes rinsing and coating. Use a scale, sieve, bowl, spatula, spice grinder or mortar, 24 cm steamer, clean thin food-grade cotton liner, slotted spoon and tray. Choose unsalted moist wet-milled flour made from non-glutinous Korean short-grain rice, often sold frozen; thaw covered in the refrigerator if needed and weigh 250 g afterward. It should hold a loose clump when squeezed. Dry bagged rice flour, glutinous flour and wheat flour require different formulas. This batch is plain white and uses no foraged needles or colorings.
-
Step 2
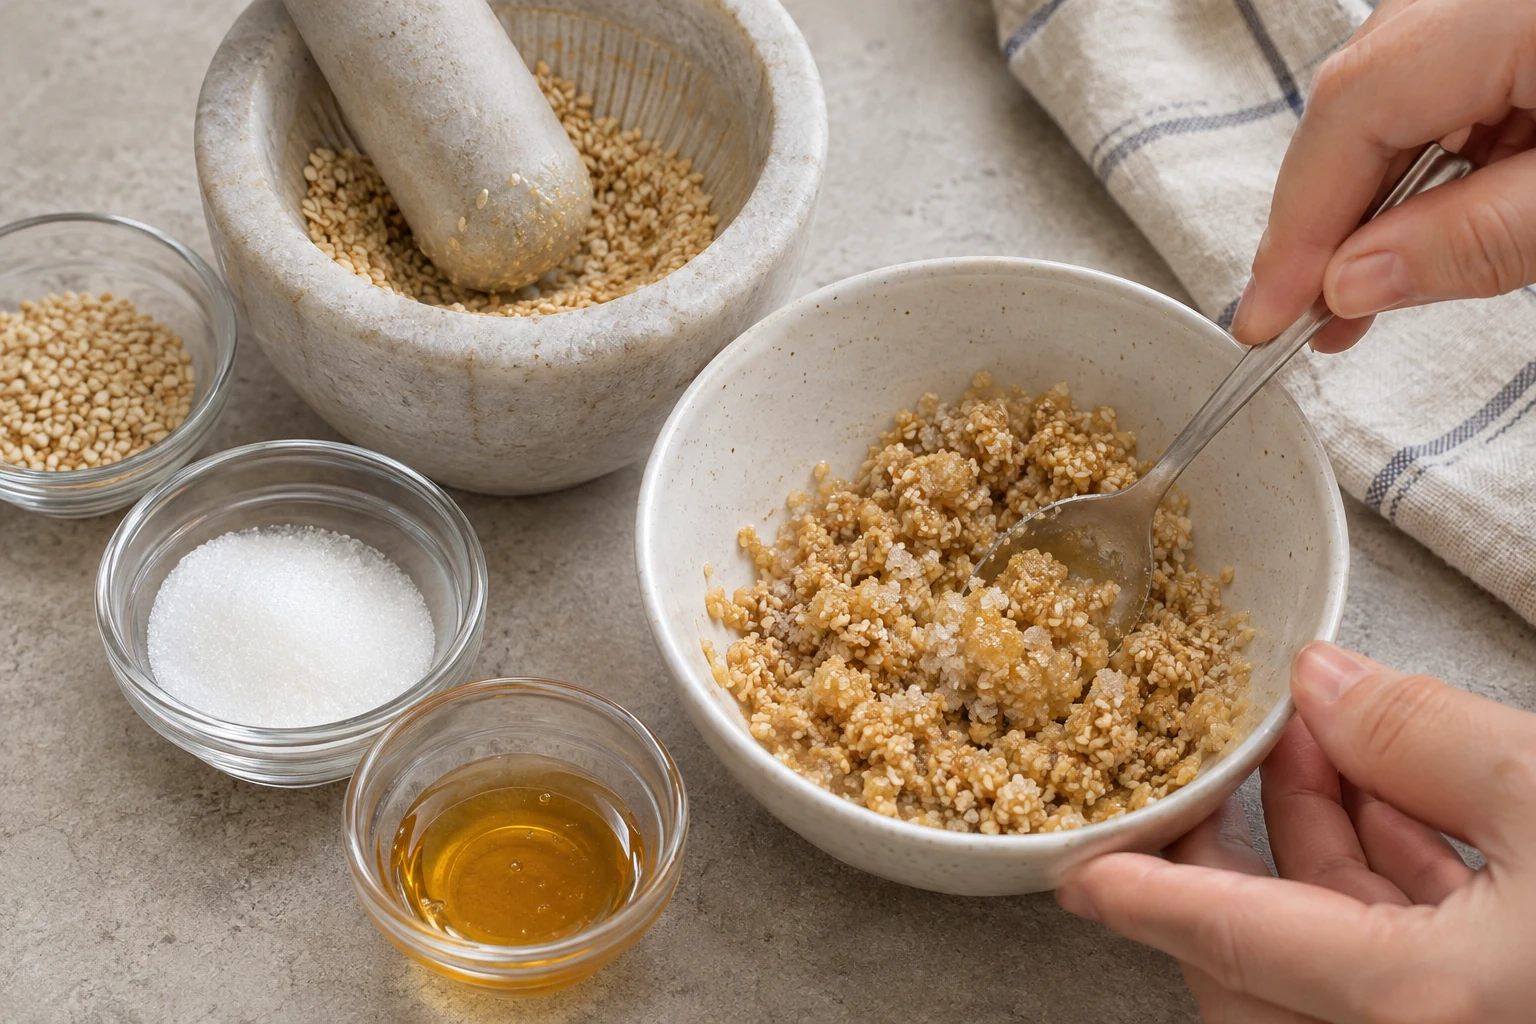
Inspect the ready-to-eat toasted sesame seeds, removing debris; do not wash the dry toasted seeds. Warm 30 g in a dry pan on low for 2–3 minutes, shaking until fragrant without darkening, then cool for 5 minutes. Grind coarsely in a mortar or short grinder pulses, leaving some texture. Mix with 2 level tablespoons sugar (24 g) and 2 teaspoons honey (14 g) until the filling resembles damp crumbs and holds when pinched. Divide into sixteen small piles, about 4 g each. Let it cool fully before filling so steam does not soften the dough.
-
Step 3
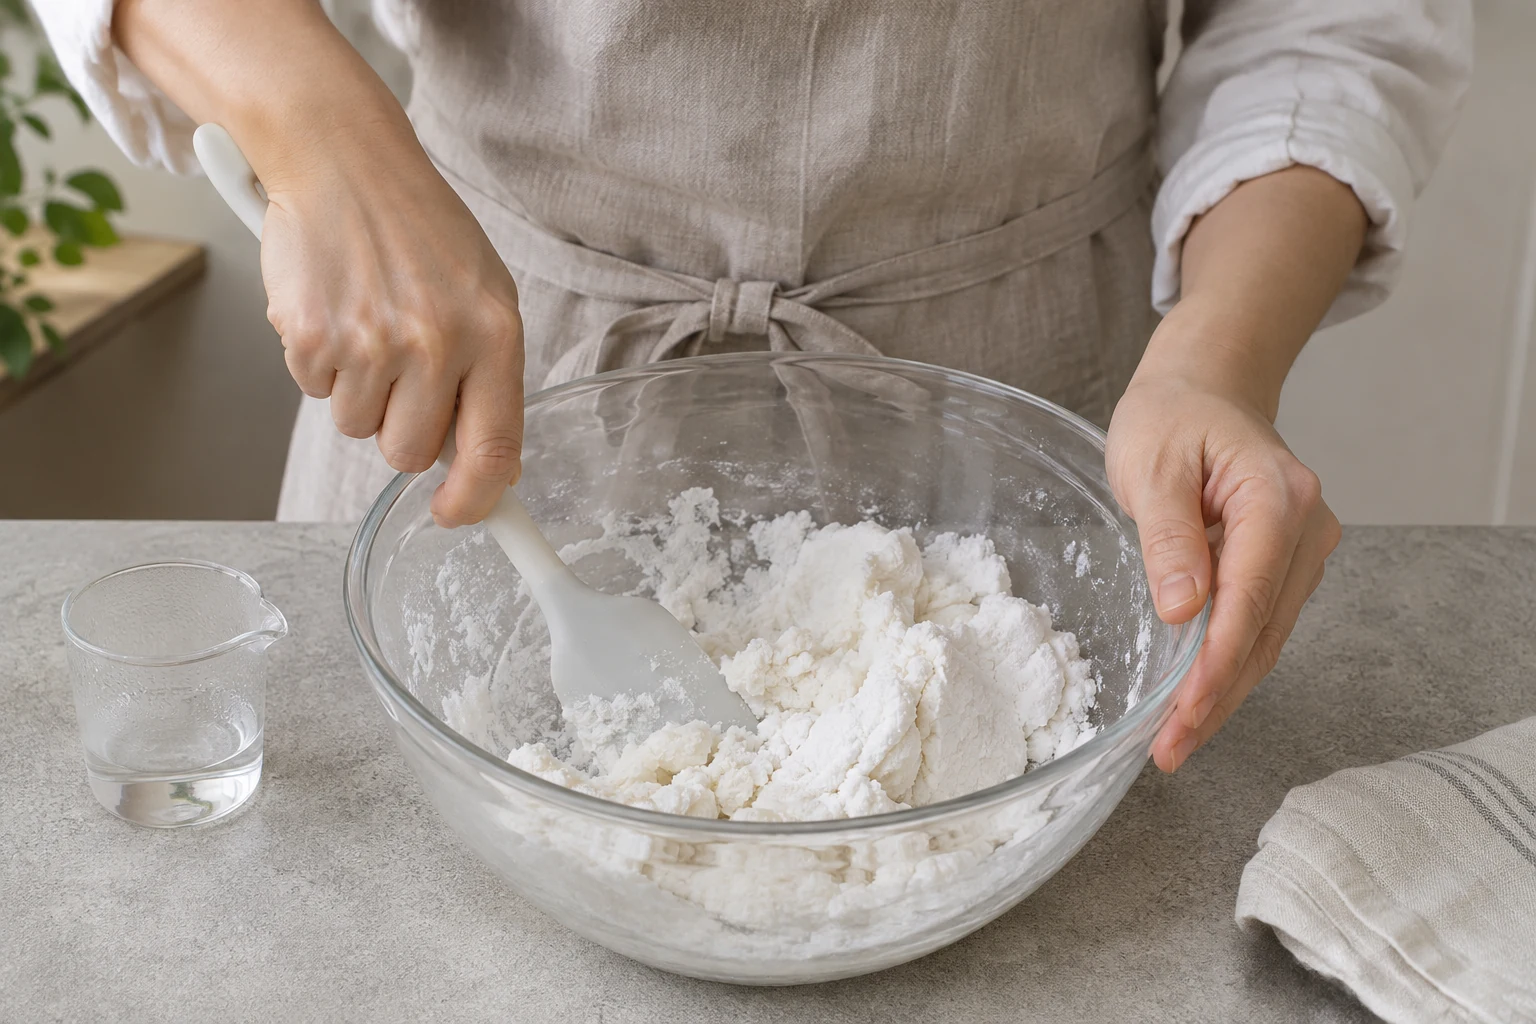
Sift the 250 g wet rice flour and ¼ teaspoon salt into a bowl, breaking moist lumps with a spoon. Pour in 3 tablespoons freshly boiled drinking water (45 ml) gradually while stirring with the spatula. Keep hands away until comfortably warm, then knead firmly for 4–5 minutes. Add the reserved water only if the dough cracks when rolled, 1 teaspoon at a time, at most 1 tablespoon (15 ml). It should feel like soft modeling clay, with smooth edges, not a sticky batter. Flour moisture varies: stop adding as soon as it becomes pliable. If sticky, cover and wait 5 minutes before judging again rather than adding random flour.
-
Step 4
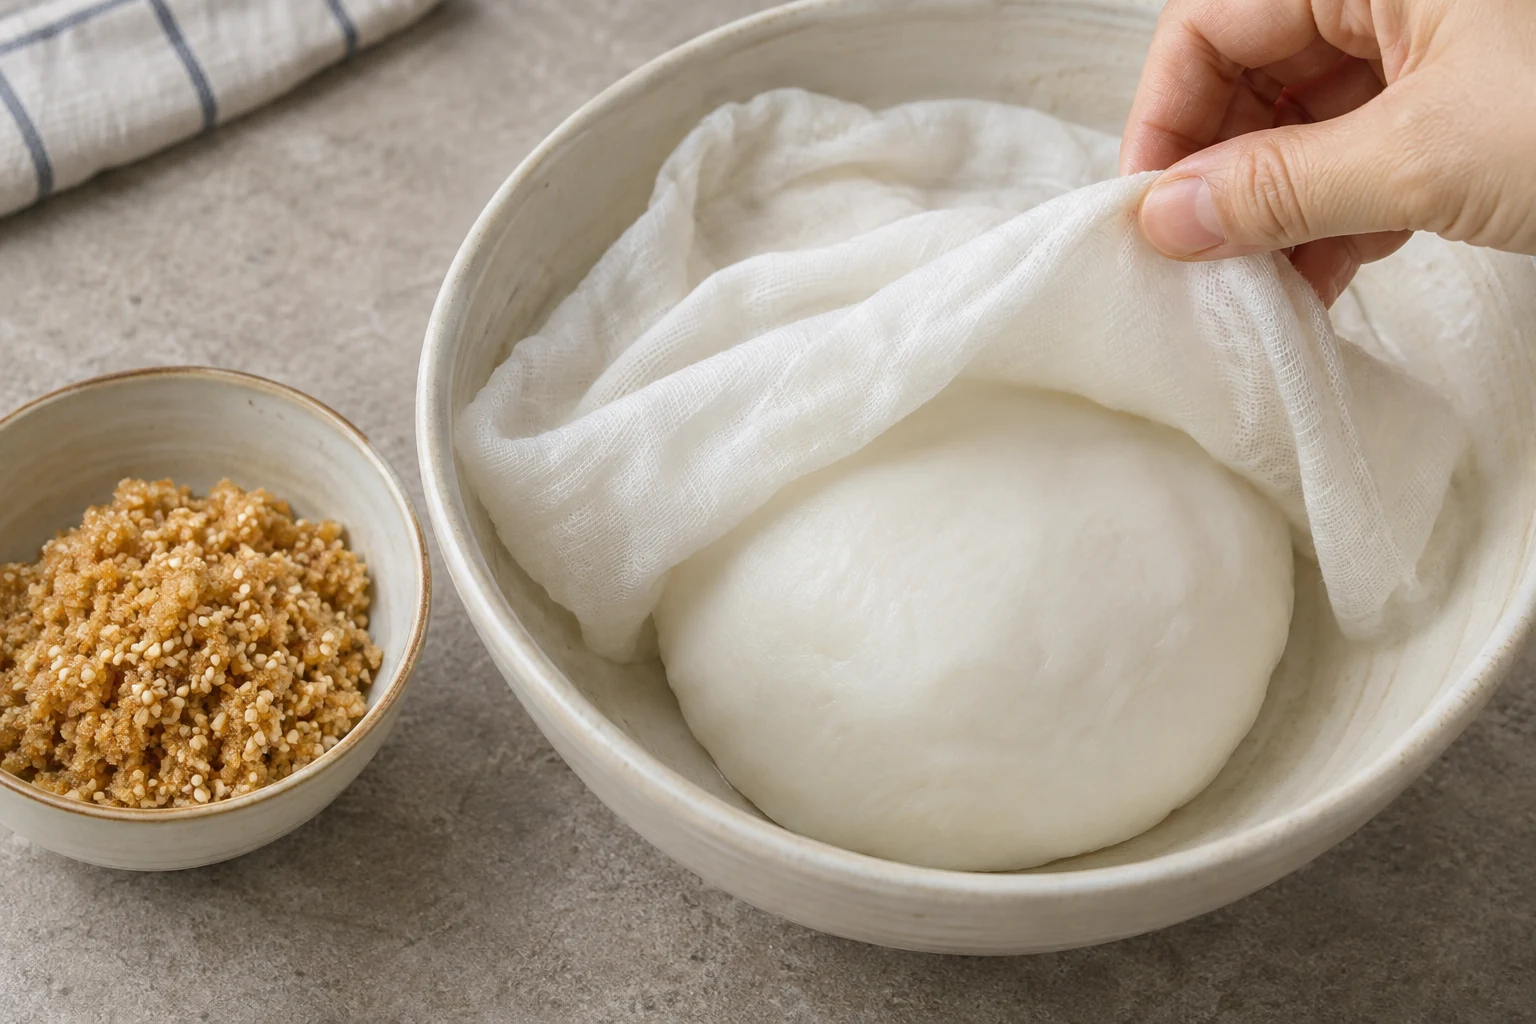
Shape the dough into one ball, cover closely with a clean damp cloth or food cover and rest for 15 minutes at room temperature. Keep the cover touching or close to the surface so a dry skin does not form. Knead again briefly afterward. Pinch off a small test piece and press it flat: its rim should stay smooth. If it still cracks, knead in a little of the measured reserve if any remains. Do not add oil to the raw dough, and keep the sesame filling in a separate clean bowl.
-
Step 5
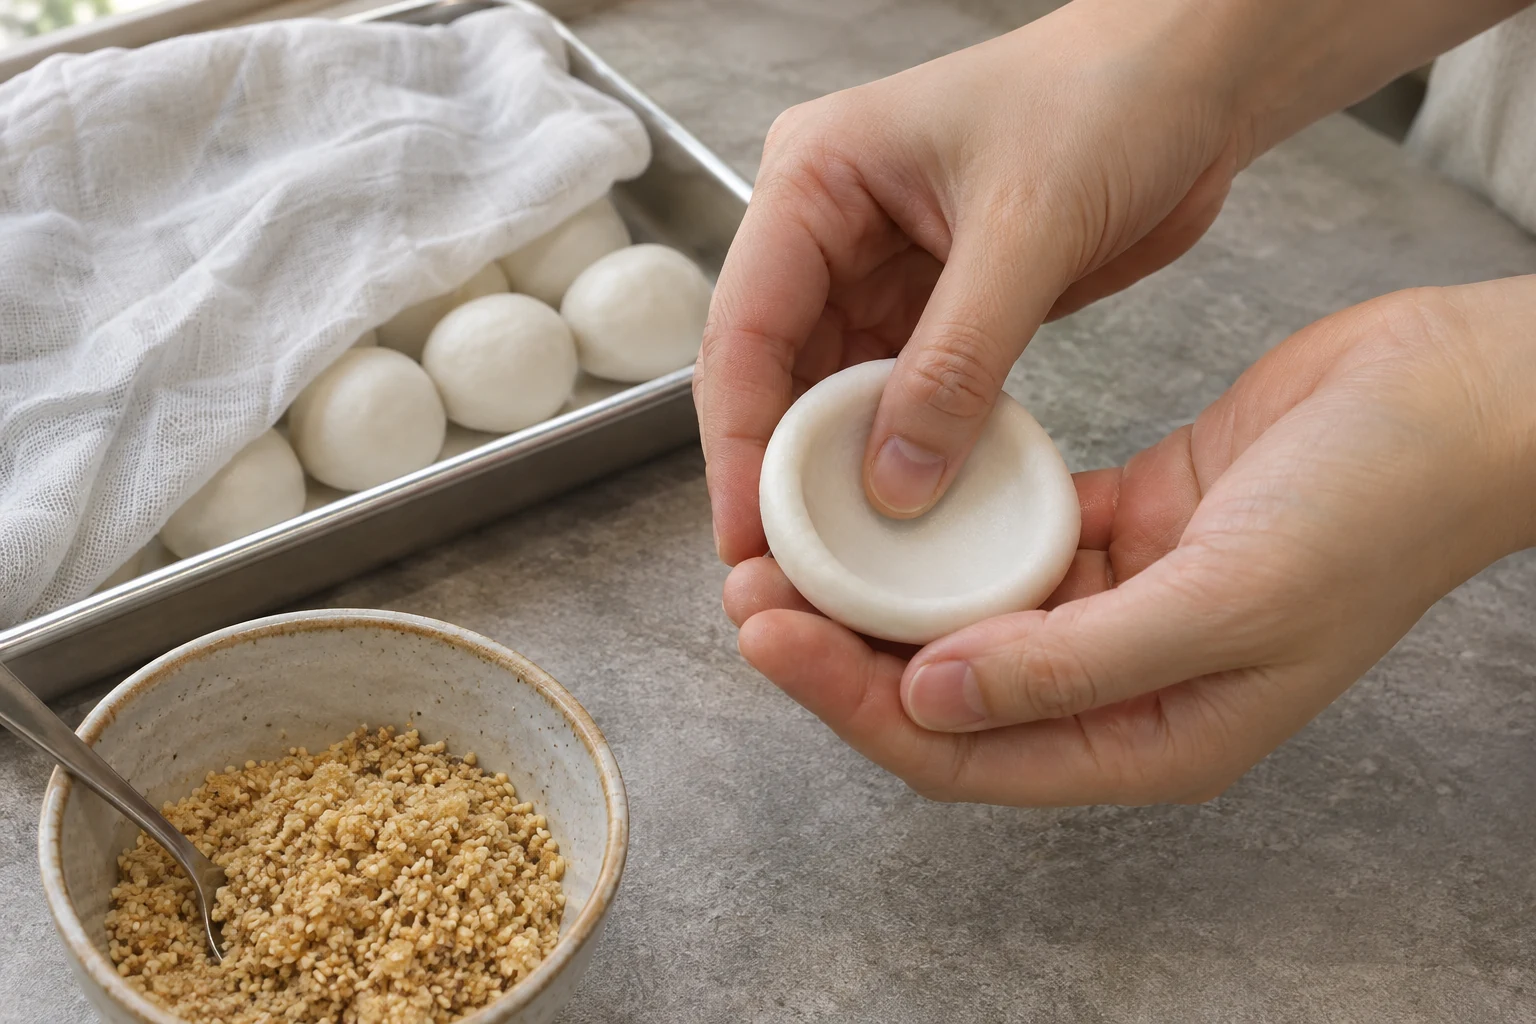
Divide the dough into sixteen equal pieces, roughly 18–19 g each depending on water used. Cover all but one. Roll the first into a smooth ball between clean hands, then make a central dent with a thumb. Turn while gently thinning into a cup about 3 cm wide, with walls around 3 mm thick. Keep the bottom intact and the rim clean. If edges split, pinch them smooth before filling rather than hiding a crack under more filling. Small equal portions cook more evenly than a mixture of thick and thin cakes.
-
Step 6
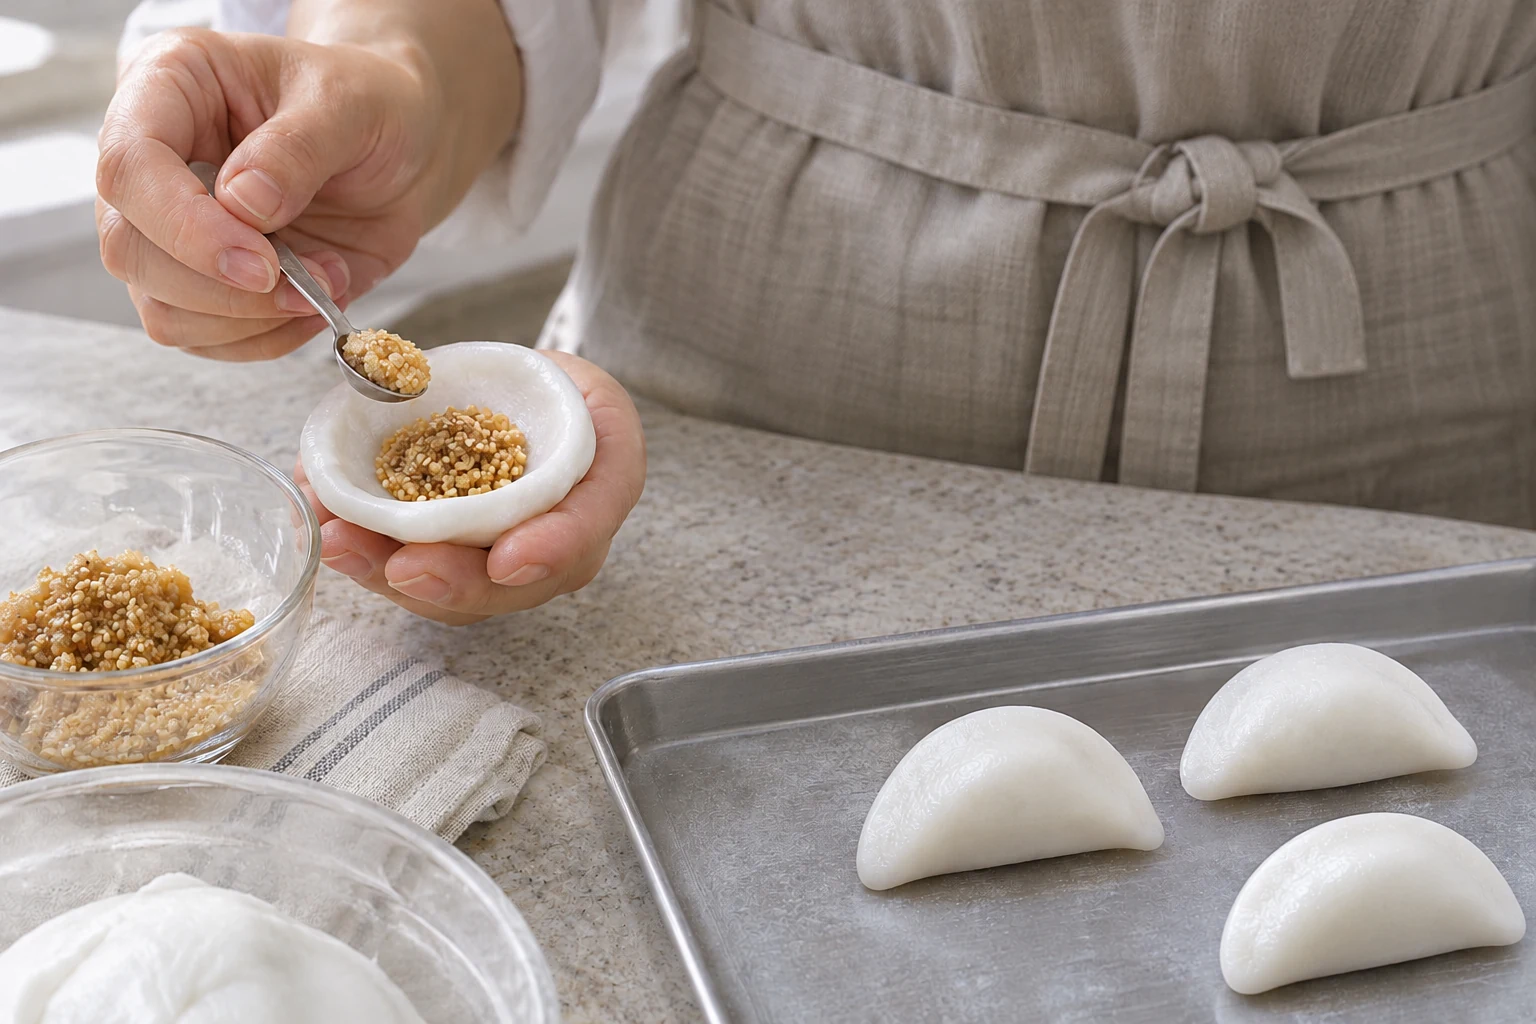
Put one predivided filling portion, about 4 g or a scant ½ teaspoon, into the dough cup. Leave the rim free of sesame and sugar. Pinch the rim firmly closed, gently push out trapped air and smooth the seam. Curve into a plump half-moon roughly 4 cm long, without thinning the ends to sharp points. Cover the shaped cake and repeat with the remaining fifteen. Overfilling or a sugary rim causes leaks; if a seam opens, remove a little filling and seal again with clean dough edges. Keep finished raw cakes from touching.
-
Step 7
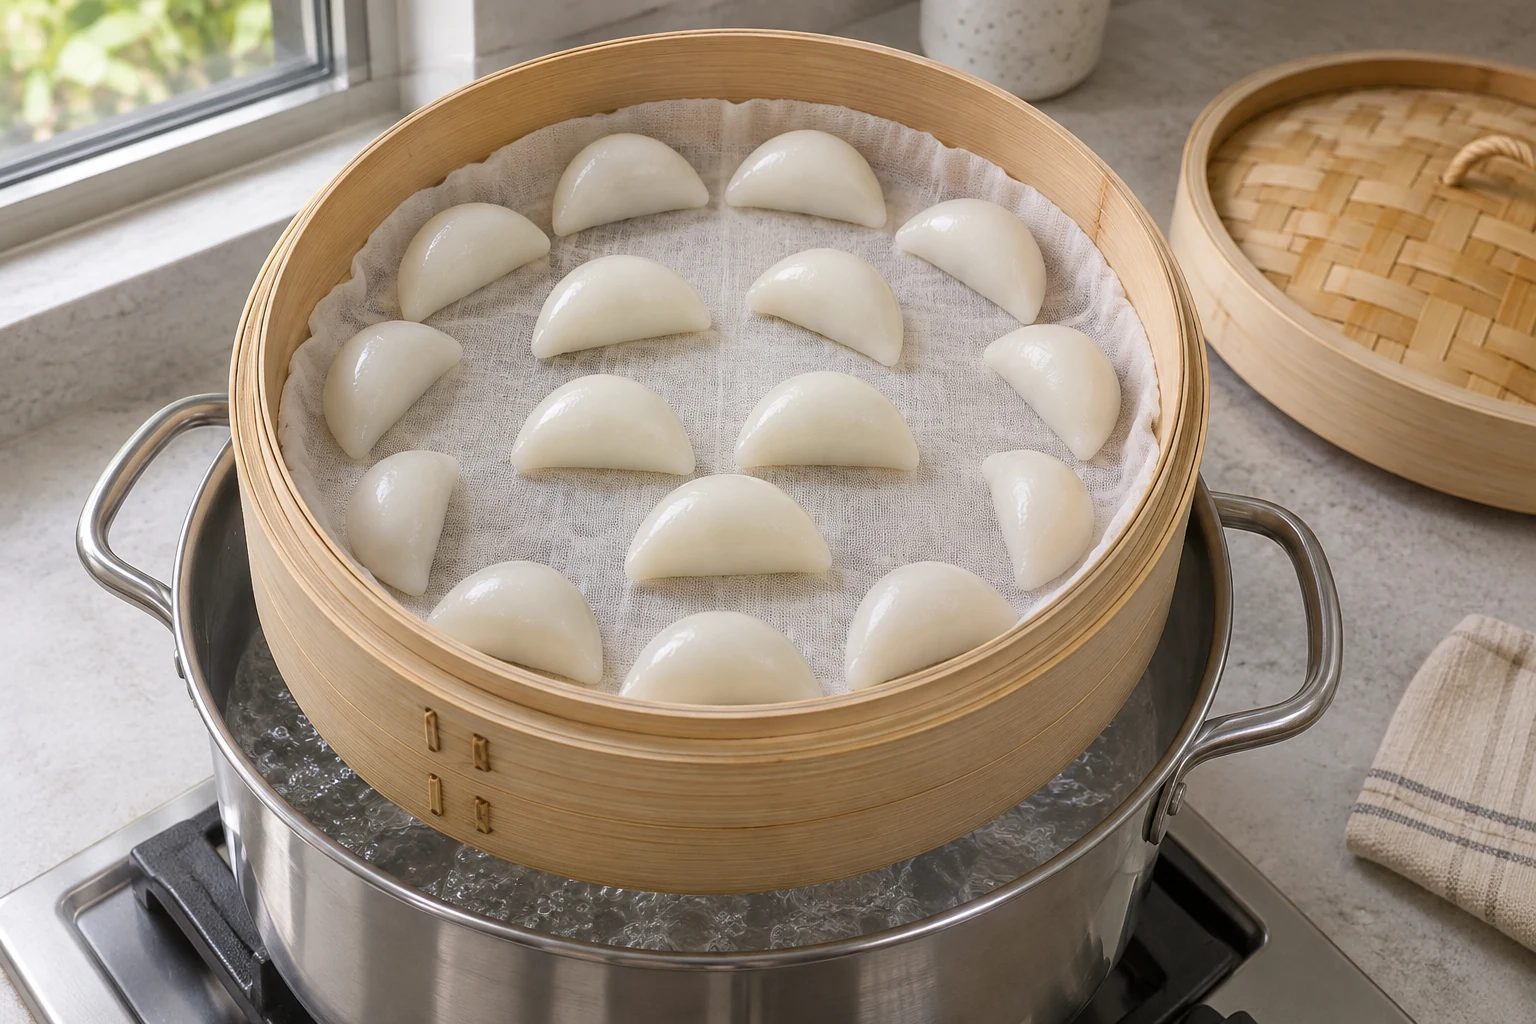
Pour the 900 ml steamer water into the lower pot, keeping its level at least 2 cm below the basket. Bring to a full boil. Rinse the clean food-grade cotton liner, wring thoroughly and spread in the basket with the edges tucked safely inside; no fabric may hang near a flame. Arrange the sixteen cakes in one layer with about 1 cm gaps, using a 24 cm basket or two baskets if needed. Do not pile them up. Seat the basket securely and close the lid. Keep the reserved 180 ml water ready to boil if topping up becomes necessary.
-
Step 8
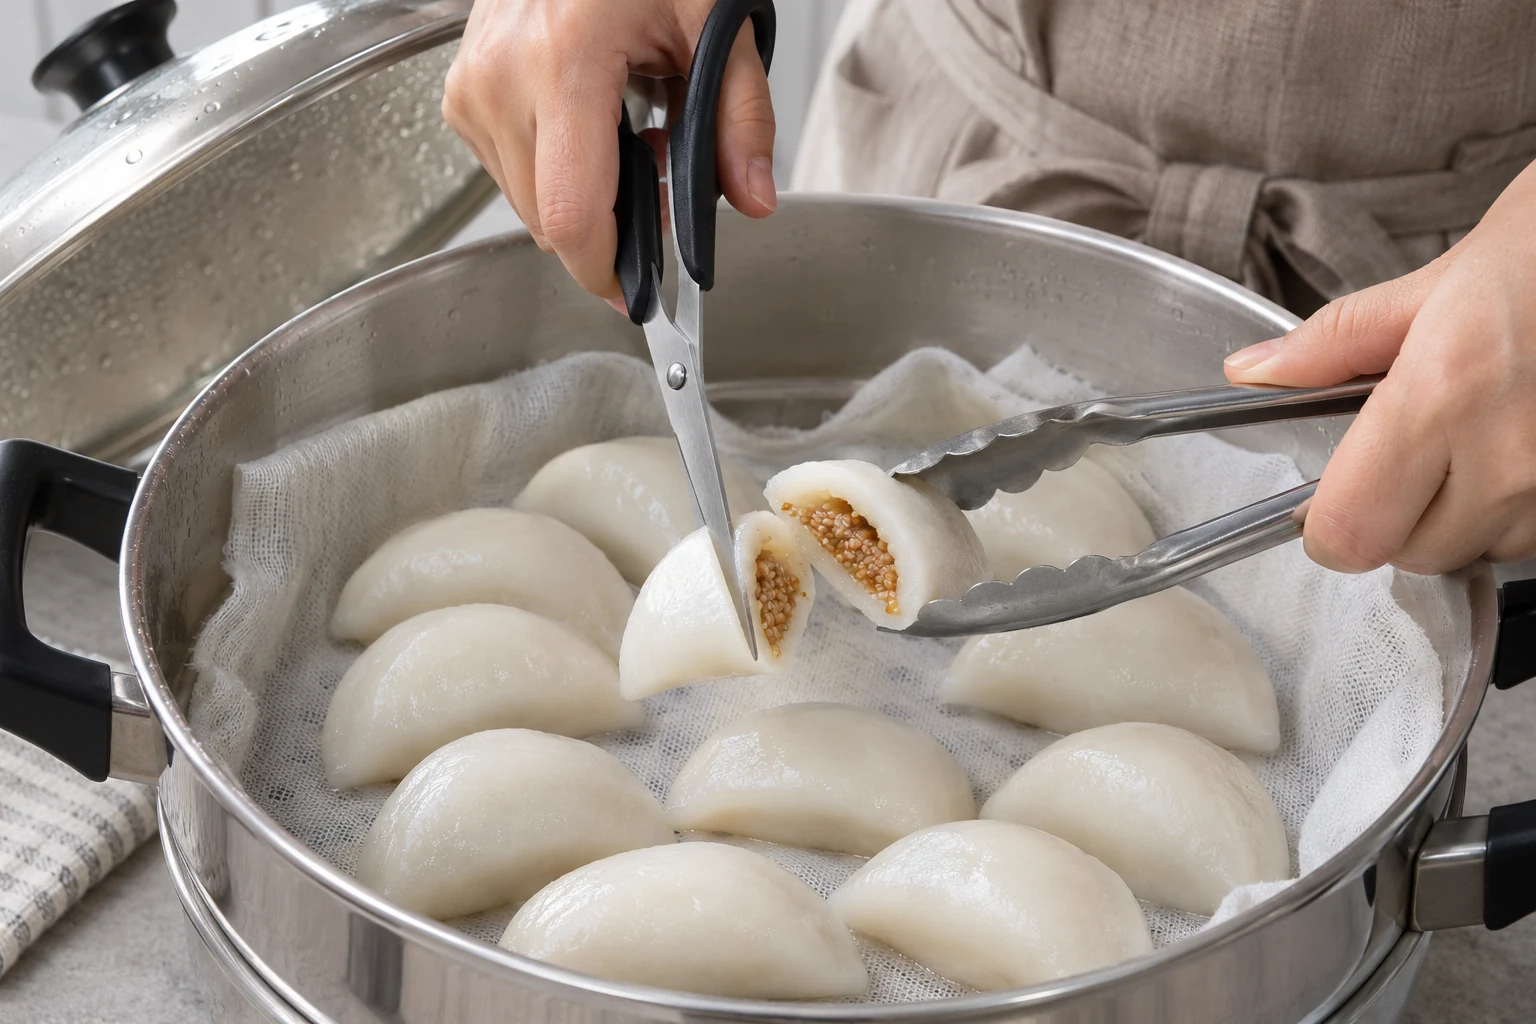
When strong steam returns, begin a 25-minute timer. Steam over medium-high heat with a steady flow, keeping the water below the cakes. Avoid lifting the lid during the first 20 minutes. If water runs low, carefully add a little of the measured reserve, boiling hot, down the lower pot side and restore steam; do not pour it onto the cakes. At 25 minutes, lift the lid away from your face and test one cake with clean tongs and scissors. The rice shell must be tender all the way through with no dry chalky flour line. If needed, steam another 5 minutes and check again. A shiny surface alone does not prove the center is cooked.
-
Step 9
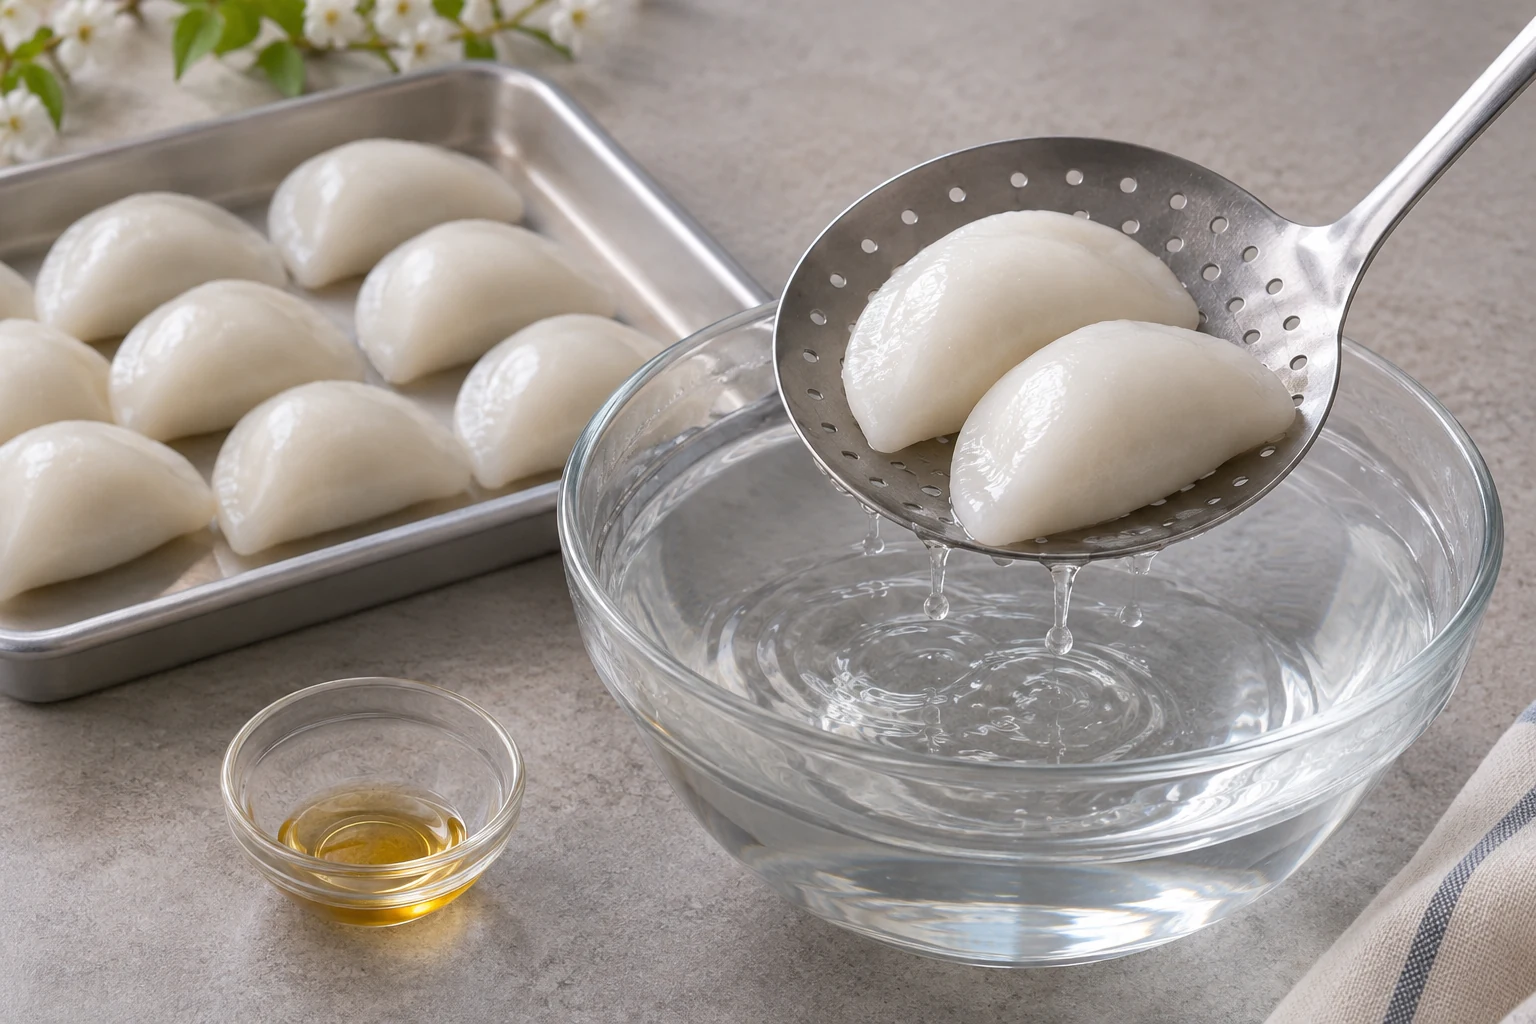
Turn off the heat and rest covered for 5 minutes. Put the 900 ml cold drinking water in a clean wide bowl. Open the steamer away from your face and lift cakes with the slotted spoon; briefly dip them in the cold water for 5–10 seconds to set the surface, then drain for 1 minute. Do not leave them soaking or squeeze out the filling. Put them on a clean tray and gently coat with the optional 1 teaspoon sesame oil, distributing it over the whole batch. If omitting oil, keep the cakes spaced apart to reduce sticking. Use utensils until cool enough to touch.
-
Step 10
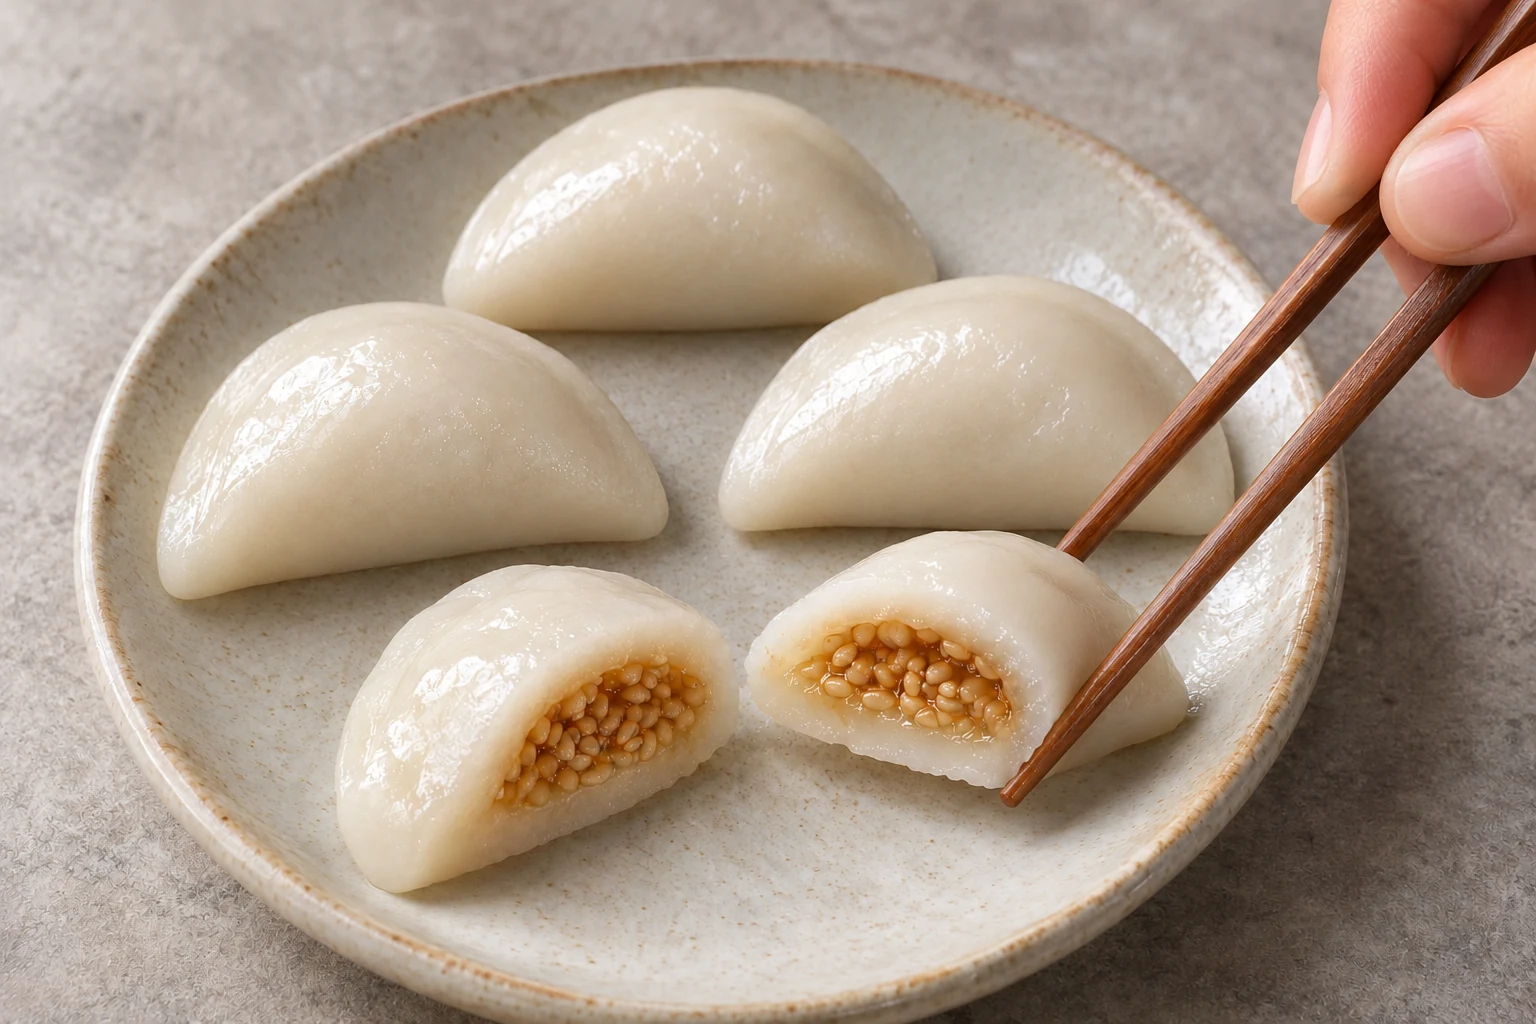
Serve four cakes per snack portion once the center and filling are comfortably warm, never straight from the steamer. Cut the test cake to show a thin cooked rice shell around the sesame filling; it is one of the sixteen, not an extra. The cake should be soft and pleasantly chewy, with a sealed seam and no raw flour taste. Eat small bites slowly rather than swallowing a whole cake. If cooled cakes have become firm, re-steam gently instead of trying to soften them with raw water. Keep unused portions covered and follow the storage limits in the notes.


Finished dish
A tablespoon is 15 ml, teaspoon 5 ml and small paper cup 180 ml. Use unsalted wet-milled NON-glutinous short-grain rice flour; do not substitute ordinary dry powder or glutinous flour by the same weight. Start with 45 ml hot dough water and use at most the 15 ml reserve as needed. The steamer reserve (180 ml) is separate from the dough water, and the 900 ml brief-rinse water is discarded. Contains sesame; check flour and honey labels. Honey is unsuitable for children under 1 year. Rice cakes can be a choking hazard: cut into small bites and do not serve whole cakes to small children or anyone with swallowing difficulty. Best freshly made and comfortably warm. Refrigerate leftovers in a shallow covered container at 4°C or below within 2 hours, or 1 hour above 32°C, and use within 1 day. Refrigeration firms the rice shell; re-steam for about 5–8 minutes until tender and hot throughout, reaching 74°C in the center, then cool to a comfortable eating temperature. Do not keep steamed rice cakes warm on the counter overnight.
Related recipes


Enjoy every bite
How to enjoy it
Offer four small cakes with a warm unsweetened drink. Let the sesame filling cool enough before the first bite, and eat small pieces slowly to enjoy the rice shell and fragrant filling.

