Pressed pork-head slices from scratch (pyeonyuk)
Simmer boneless skin-on pork head meat and ear until tender, slice and press into two shallow loaves, then chill thoroughly before cutting. Natural skin gelatin binds the layers. Four portions, about 735 minutes including an 8-hour refrigerated pressing period; begin the day before serving.

Ingredients
4 servings

Everyday kitchen measurements
For 4 servings. Use a small 180 ml paper cup, a level eating spoon (about 15 ml) and a small teaspoon (about 5 ml).
How to fill the cup and spoons
Use the same cup and spoons throughout. Their sizes vary, so these amounts are approximate. Spoon flour in loosely and level the top without pressing. Measure vegetables after chopping, without packing them down. The amounts in g/ml are the original reference quantities. For part of a pack, use the specified pack weight and divide the contents evenly.
King Arthur Baking-
Essential
Required for this recipe; use the listed amount.
-
Essential
Required for this recipe; use the listed amount.
-
Essential
Required for this recipe; use the listed amount.
-
Essential
Required for this recipe; use the listed amount.
-
Essential
Required for this recipe; use the listed amount.
-
Essential
Required for this recipe; use the listed amount.
-
Essential
Required for this recipe; use the listed amount.
-
Essential
Required for this recipe; use the listed amount.
-
Essential
Required for this recipe; use the listed amount.
-
Essential
Required for this recipe; use the listed amount.
-
Optional
May be omitted without changing the other quantities.
-
Substitute available
If Packaged saeujeot, salted fermented tiny shrimp is unavailable
- Use instead
- Soy sauce
- Substitute quantity
- 1 tablespoon (15 ml)Reference quantity: 15 ml
If saeujeot is unavailable, use 1 tablespoon soy sauce (15 ml) instead, keeping the original 1 tablespoon water and 1 teaspoon vinegar in the dip. Mix cold at the same serving stage; no heating or extra cooking time is needed. The dip loses its fermented-shrimp flavor. Check soy sauce for wheat.
-
Essential
Required for this recipe; use the listed amount.
-
Essential
Required for this recipe; use the listed amount.
-
Optional
May be omitted without changing the other quantities.
-
Essential
Required for this recipe; use the listed amount.
-
Essential
Required for this recipe; use the listed amount.
Tap each ingredient as you prepare it. Check product labels for egg, soy, sesame, wheat, fish or shellfish where relevant.
Step-by-step cooking
Check off a completed step to move to the next one. After the last step, you will move to the finished dish.
Completed steps are saved in this browser. Start over to clear this recipe’s progress.
-
Step 1
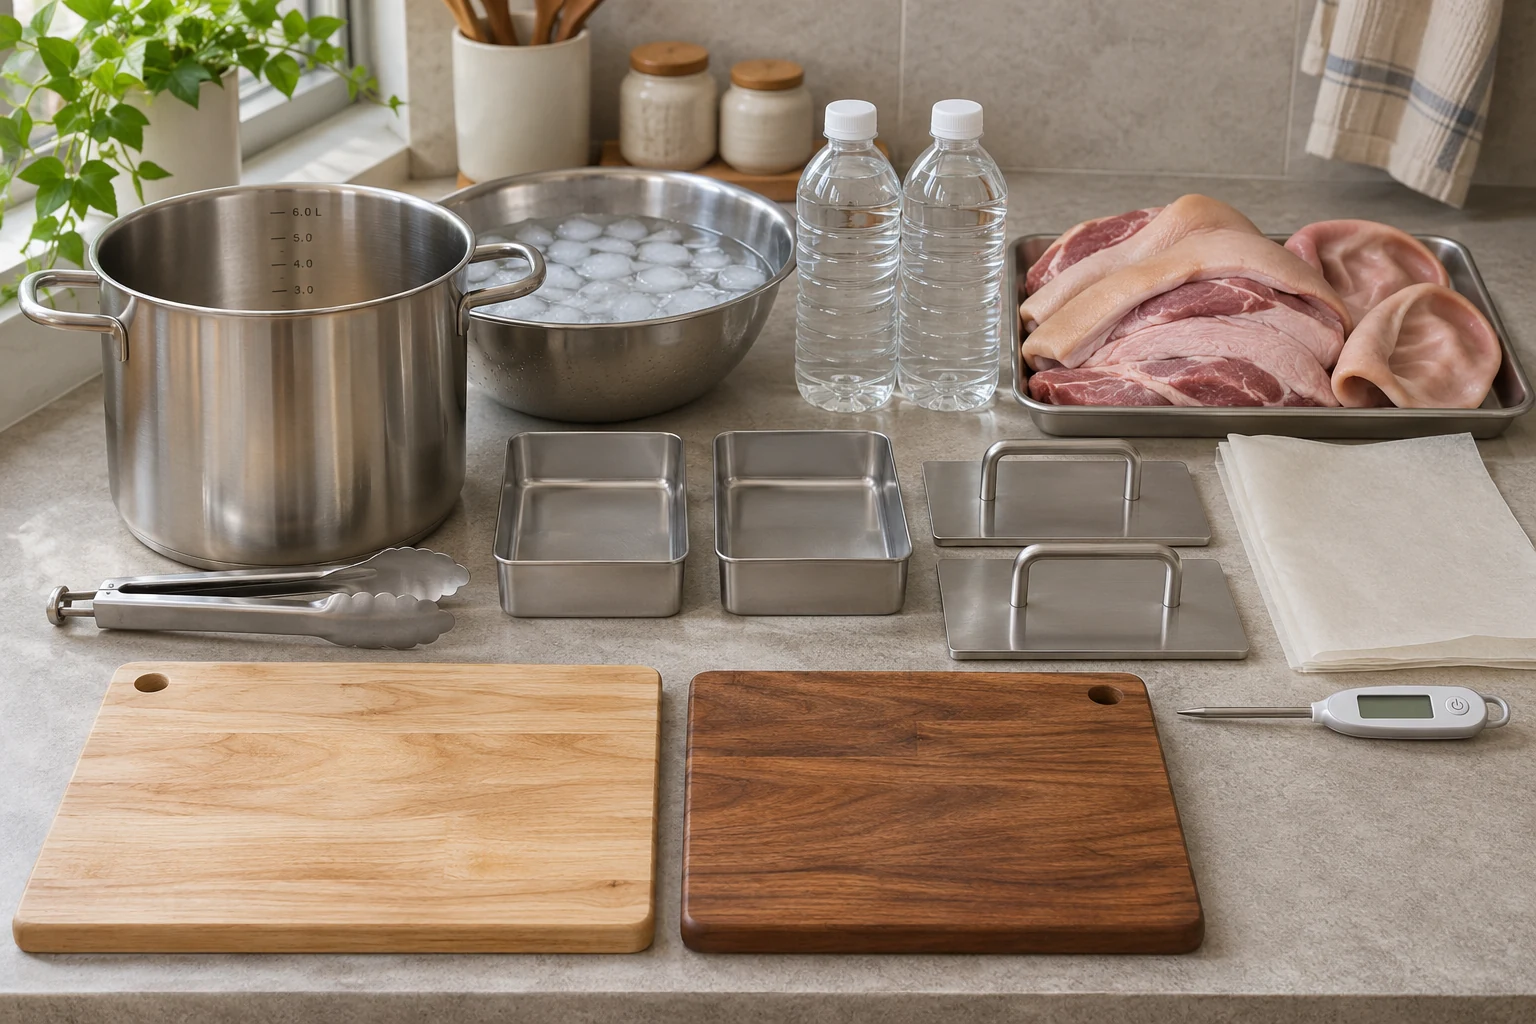
Plan 25 minutes preparation, about 20 minutes blanching including heating, 15 minutes bringing the main pot to temperature, up to 120 minutes simmering, 15 minutes packing, around 60 minutes active cooling and 8 hours pressing in the refrigerator. Ask a butcher for fresh raw deboned food-grade head meat with skin and ear, about one-quarter skin/ear in the 800 g mix; no skull, eyes, brain or large bones. Plain lean pork will not bind in the same way. Use a 6 litre pot, tongs, separate raw/cooked boards, clean probe thermometer, two shallow metal molds about 12 by 8 cm, baking parchment, two flat press plates and two clean sealed 1 kg weights. Clear refrigerator space at 4°C or below. If frozen, thaw covered there for 24–48 hours beforehand; thawing is outside the recipe time.
-
Step 2
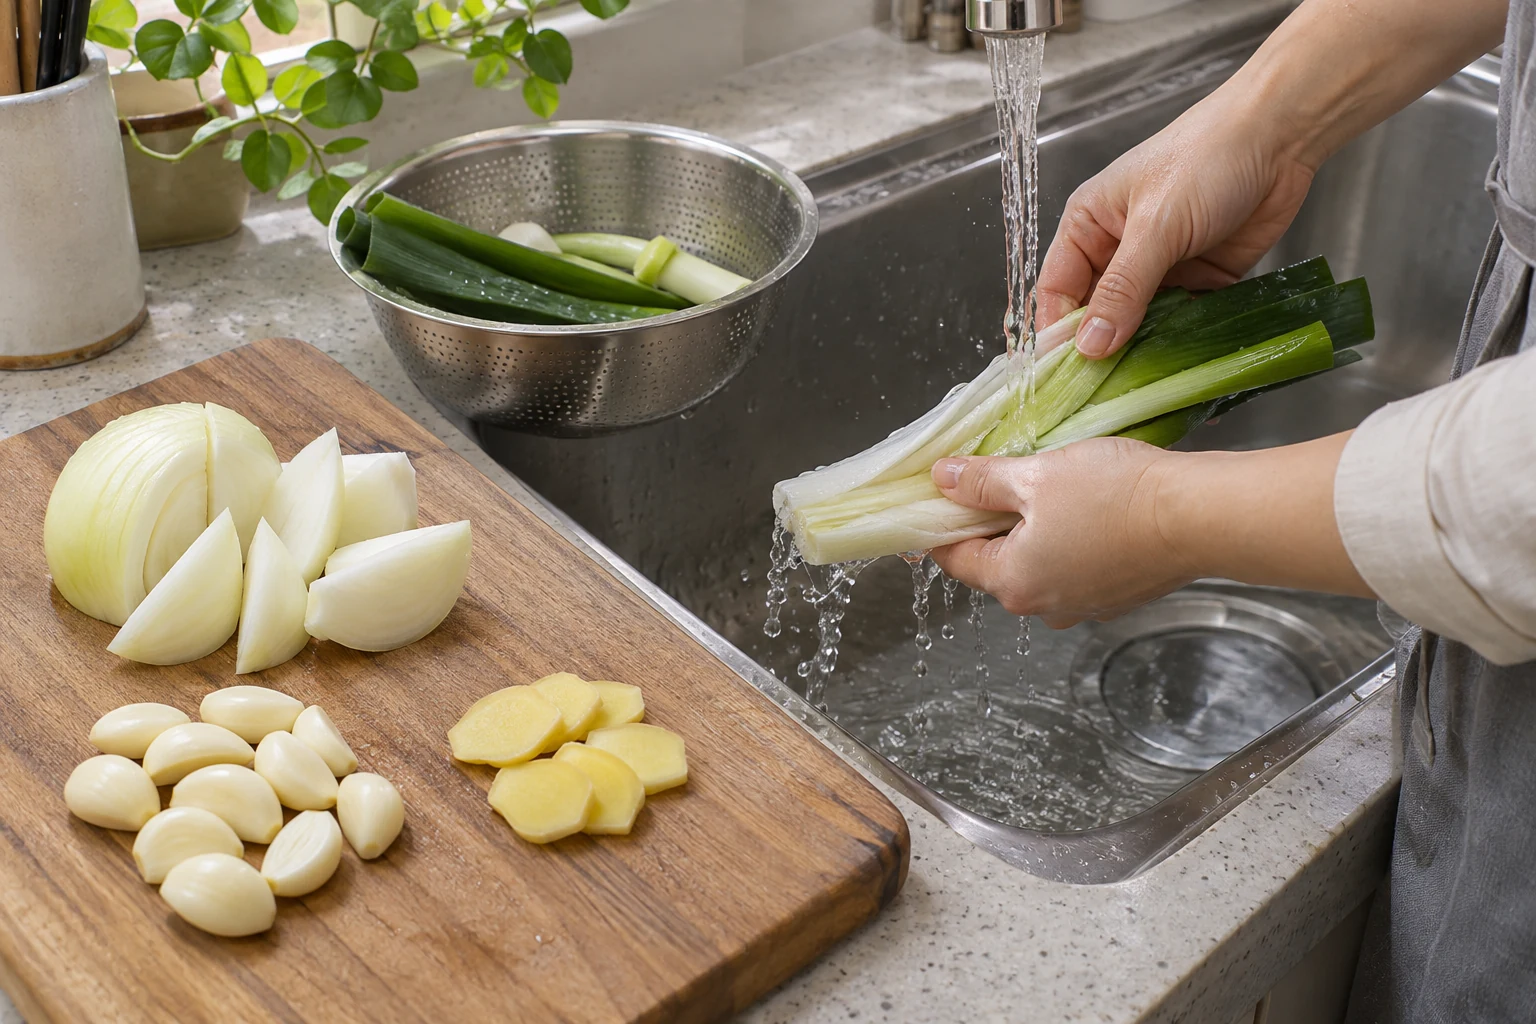
Peel the onion, remove the dry root and stem ends, rinse and cut the measured 150 g into large wedges. Trim the leek or thick green onion root and damaged leaves, split lengthwise, wash soil from every layer and cut into 5 cm lengths. Peel and rinse the garlic cloves. Scrub and rinse ginger, peel thinly and slice the 10 g piece into 2 mm coins. Measure the doenjang and peppercorns. Prepare these aromatics before touching raw meat, keeping the dipping-sauce ingredients in a separate clean area.
-
Step 3
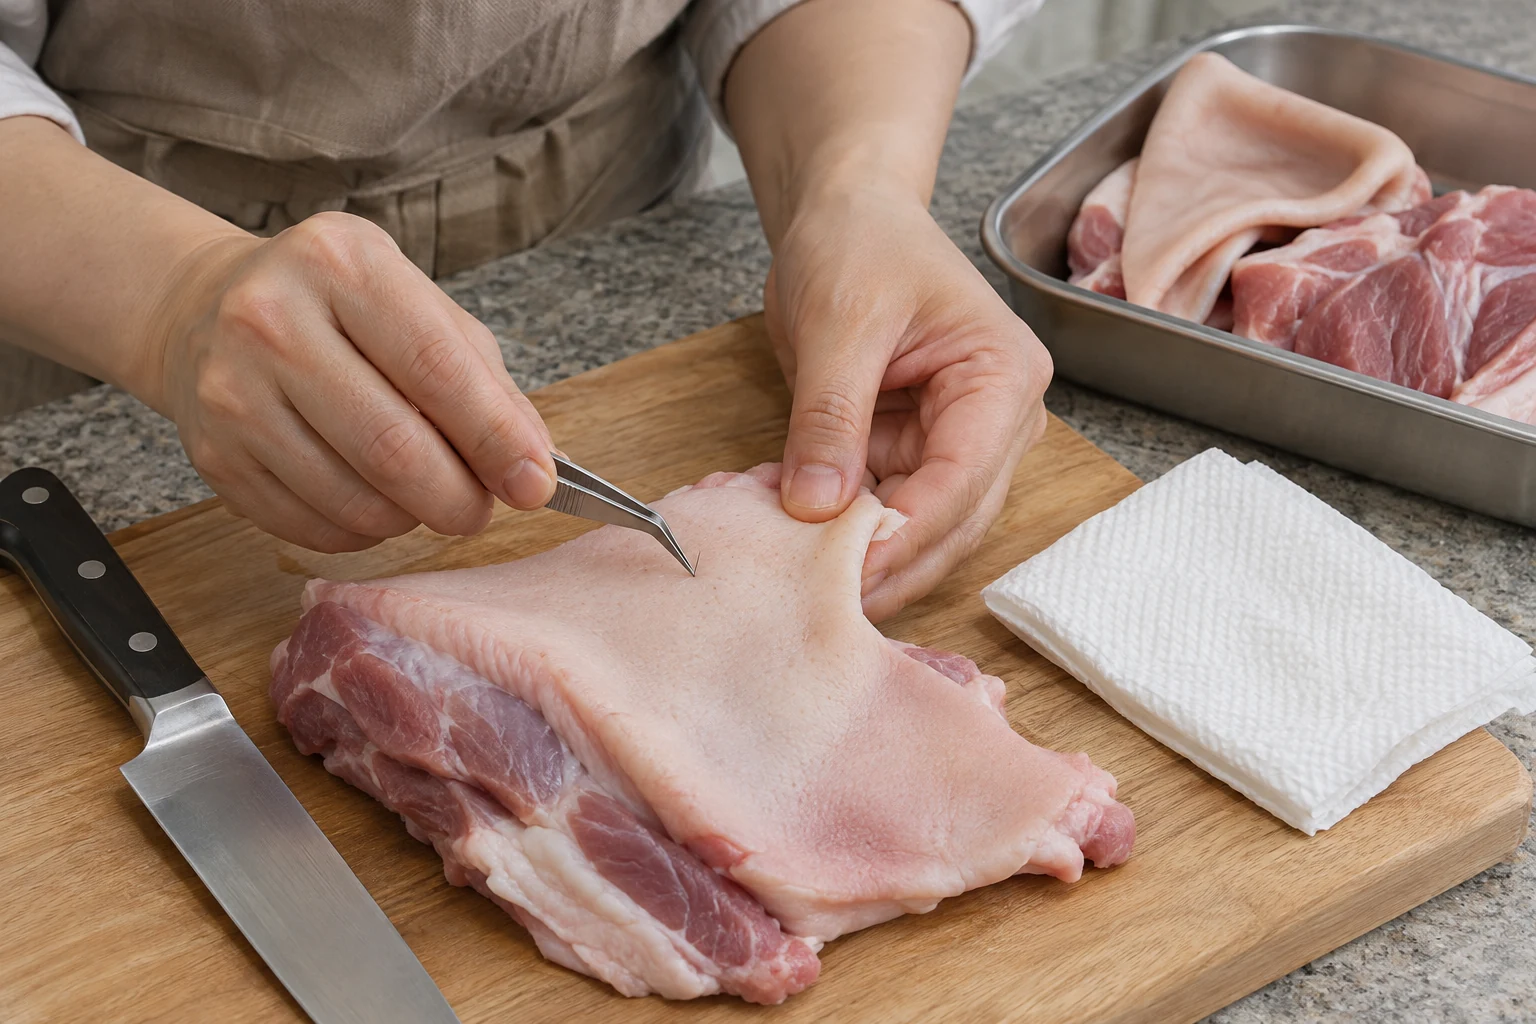
Keep the meat cold until needed. On the raw-meat board, inspect the skin and ear folds under good light. Pull out remaining bristles with clean tweezers; trim dried clots or small dirty damaged spots with a knife and discard them. Feel carefully for bone fragments and remove them. Retain clean edible skin and ear cartilage, which give the loaf structure. Cut large pieces to roughly 5 cm across and no more than 3 cm thick. Do not wash raw pork under running water or soak it around other food; use disposable towels to blot surface moisture, then wash hands and sanitize raw-contact tools and surfaces.
-
Step 4
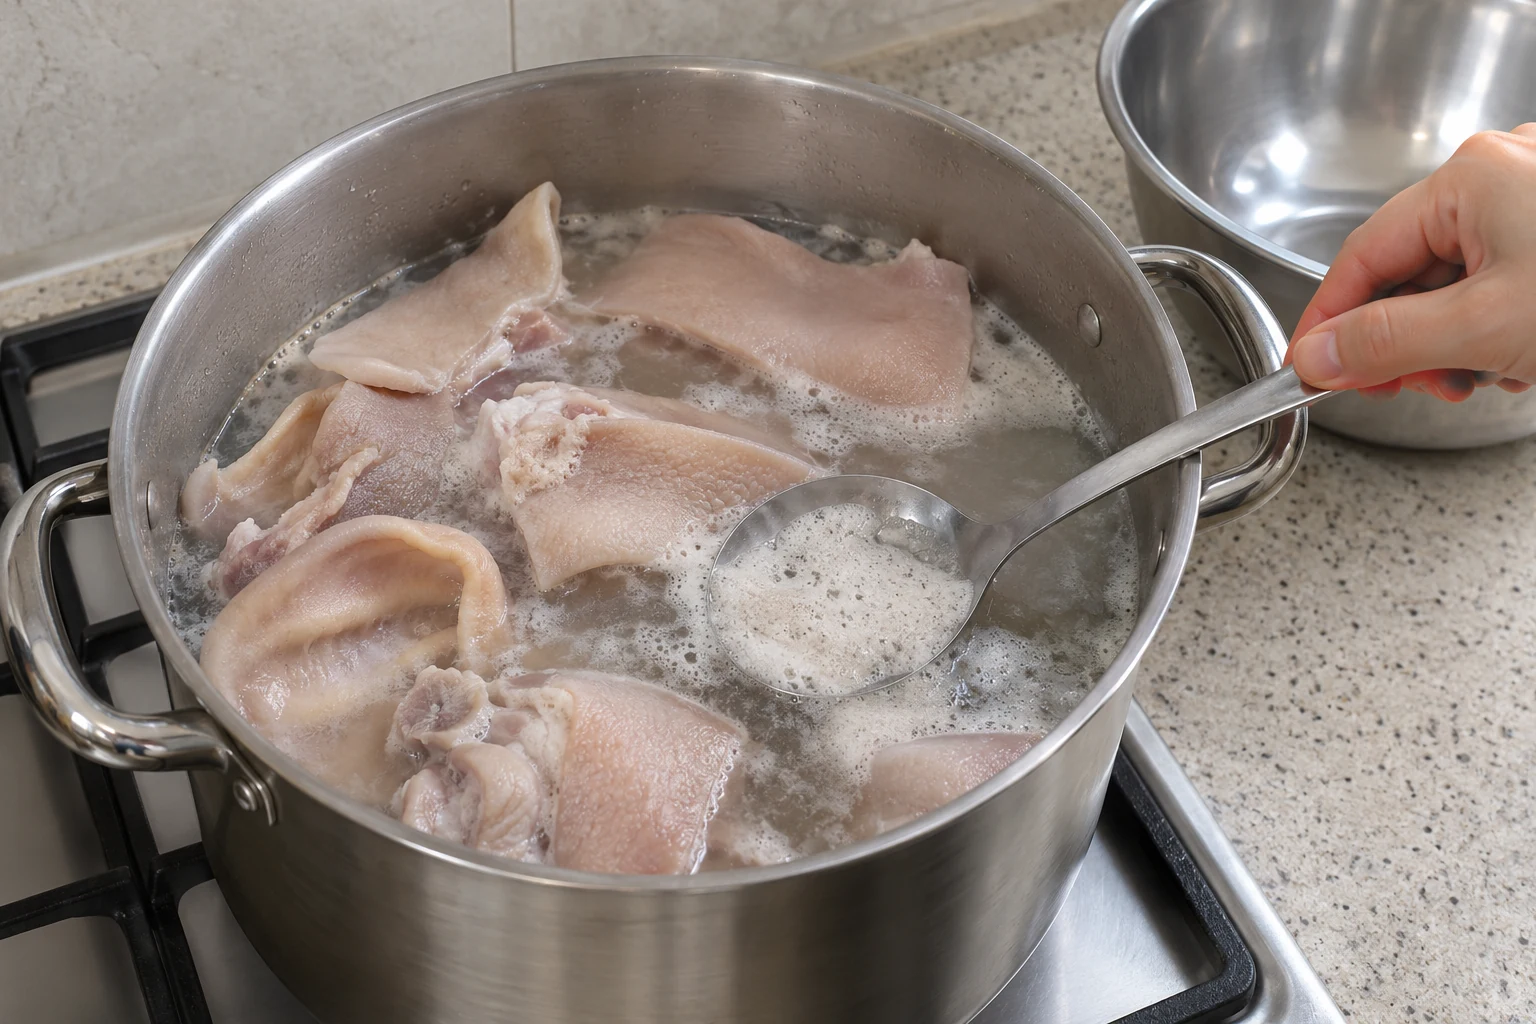
Bring the 1800 ml blanching water to a full boil in the pot. Lower in the pork with tongs, return to a boil and blanch for 5 minutes, skimming foam. Lift meat into a clean heatproof bowl. Carefully discard the blanching water; keep splashes away from food and do not pour it over the meat. Wash the empty pot, then rinse it thoroughly. Blanching removes loose residue but does not complete cooking. Use clean tongs for the following stages and keep raw utensils out of the cooked-food area.
-
Step 5
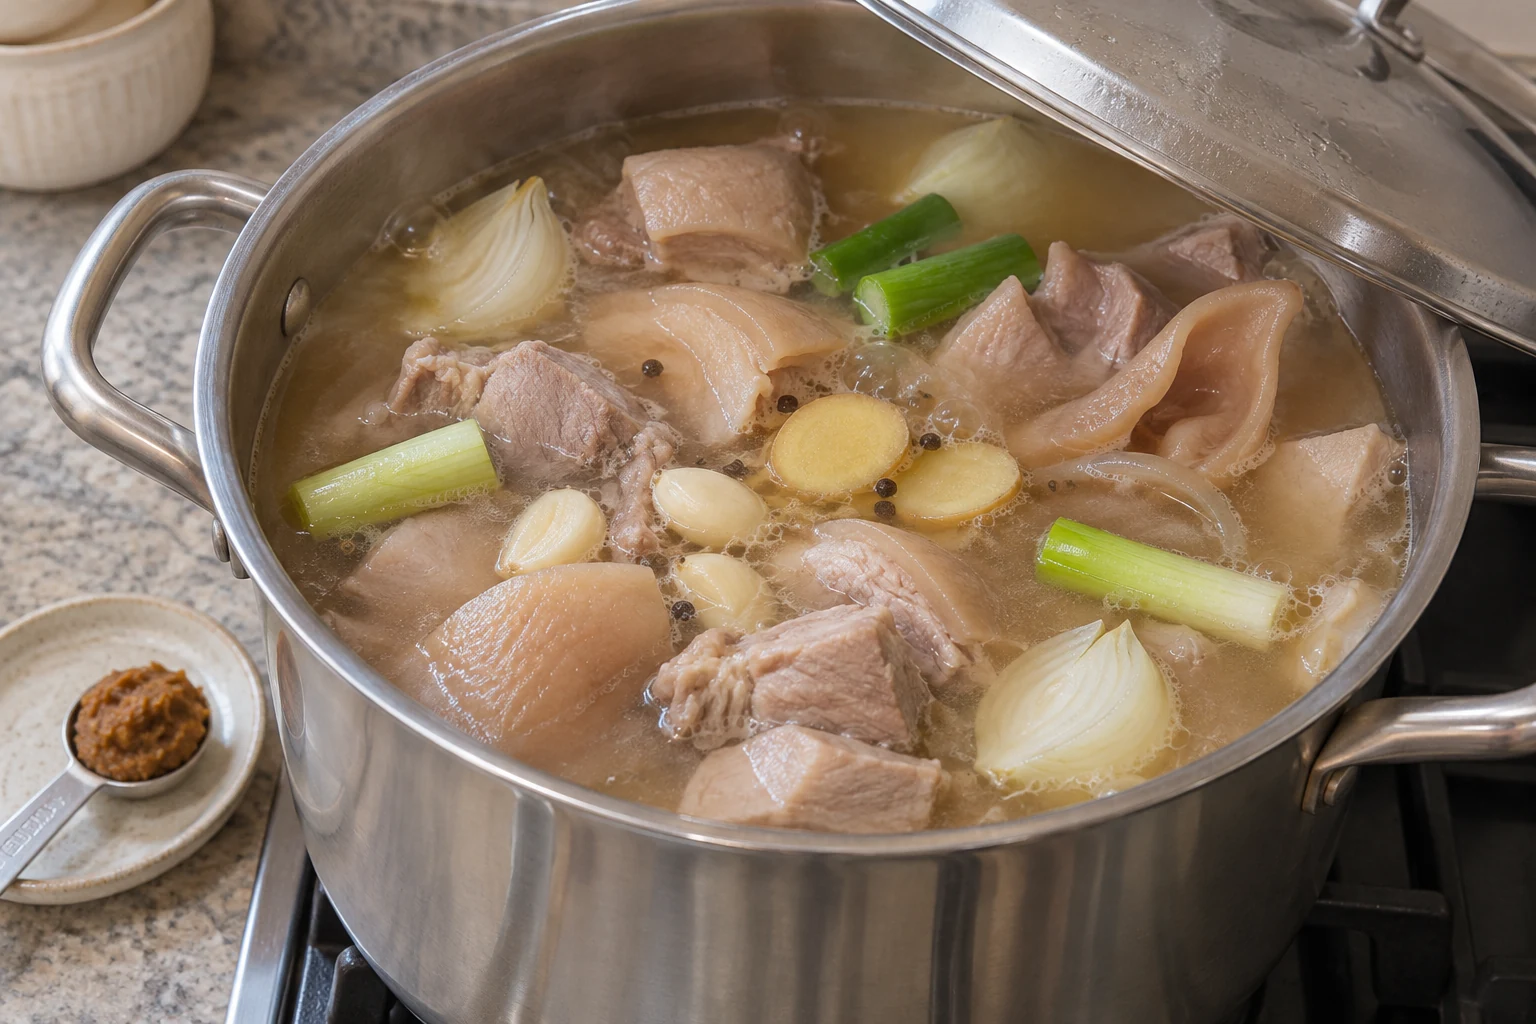
Put the blanched meat into the clean pot with 2700 ml fresh drinking water, prepared onion, leek, garlic, ginger, 1 level tablespoon doenjang and ½ teaspoon peppercorns. The liquid should cover the meat; a wide pot may need the reserved cup (180 ml) of hot water. Bring to a boil over medium-high heat, skimming new foam, then reduce to a gentle simmer with the lid partly open. The surface should move with small bubbles rather than toss the pieces violently. Start the simmering timer now.
-
Step 6
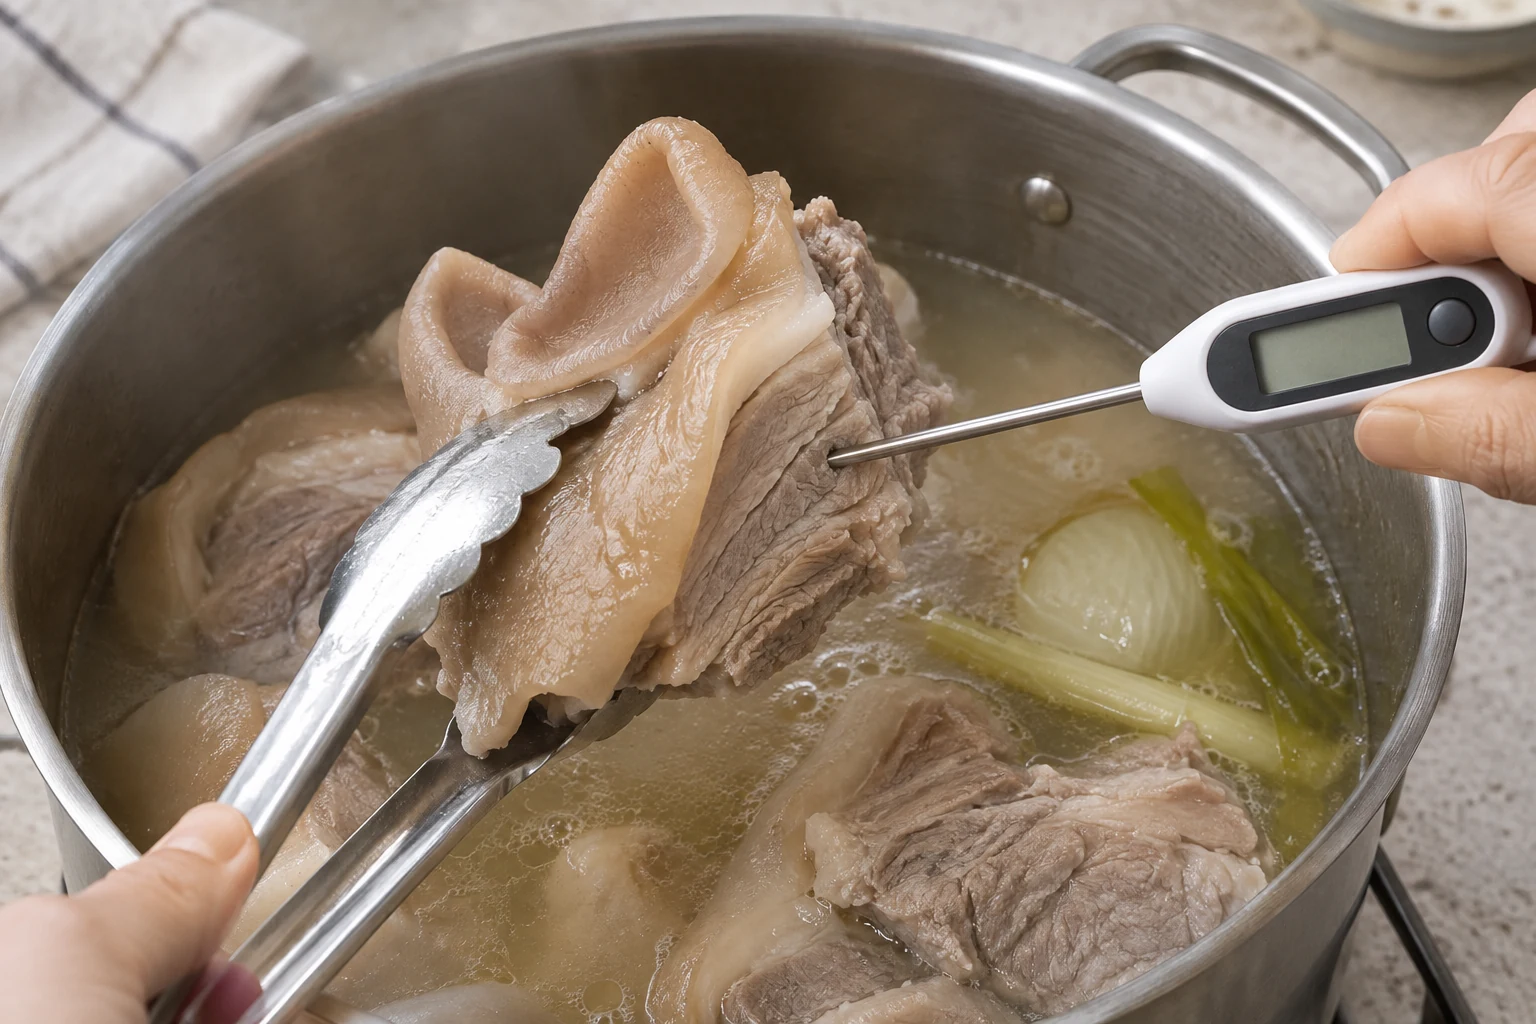
Simmer gently for 90–120 minutes, turning pieces with clean tongs every 30 minutes. Keep them under the liquid, adding only the measured hot reserve if needed; use the partly closed lid to limit evaporation. Probe several thick pieces: the centers must reach at least 74°C, and a skewer must pass easily through the skin and ear. Temperature alone does not make tough skin tender. If still rubbery, continue on low in 15-minute intervals until yielding, checking liquid and temperature again. Do not leave the stove unattended. Start the cooling clock as soon as the cooked meat comes off the heat.
-
Step 7
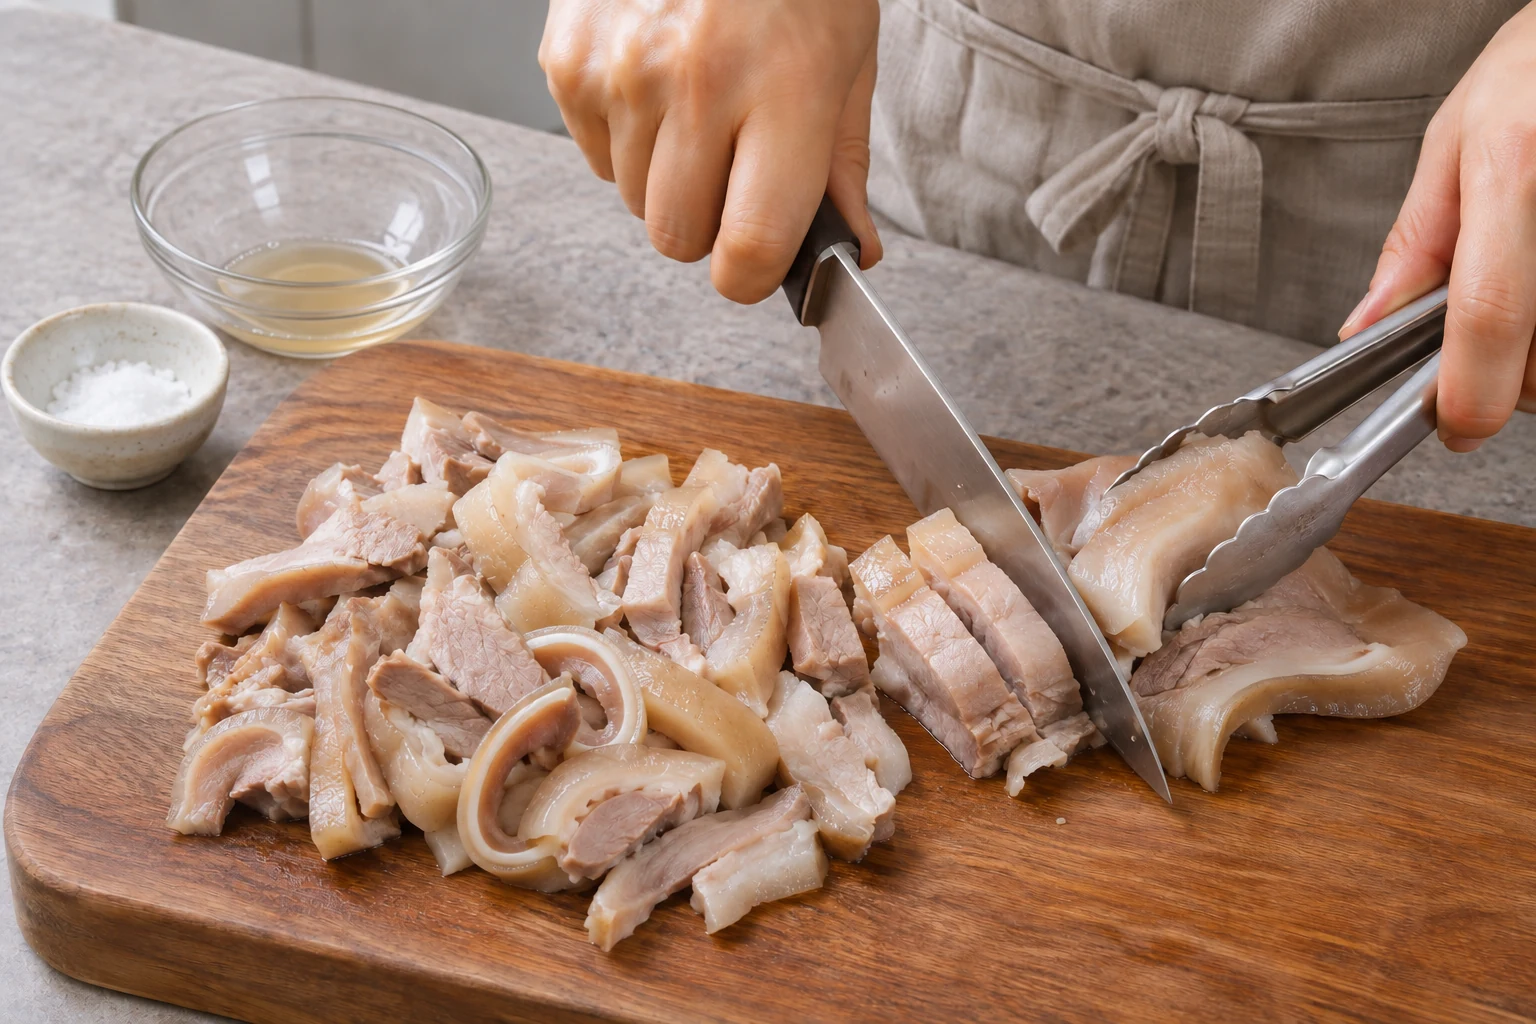
Lift tender meat onto a clean cooked-food board and drain for 5 minutes. Strain and measure 2 tablespoons (30 ml) of the hot cooking liquid, taken from the main pot. With clean tongs and a knife, check again for hard bone fragments and remove them, then cut warm meat, skin and ear across into 5–8 mm pieces. Work carefully while it is still warm enough to feel tacky, using tongs instead of bare hands. Toss with the ½ teaspoon salt, optional pinch of ground pepper and the 30 ml strained broth. Do not add a bowlful of broth: too much liquid prevents a firm loaf.
-
Step 8
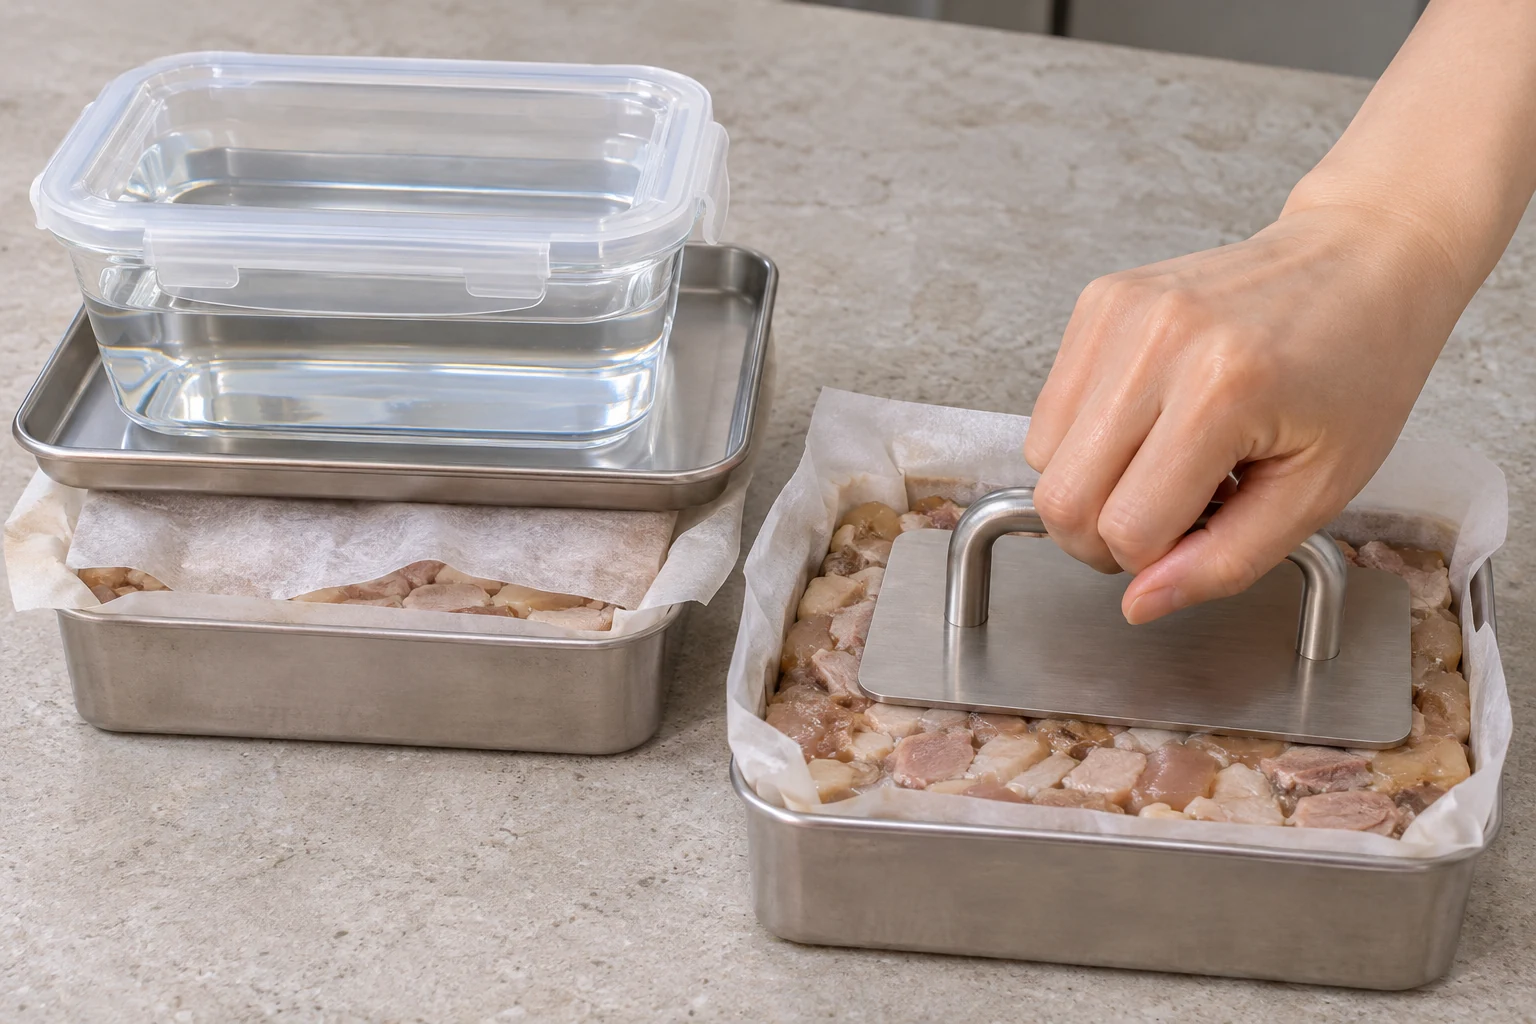
Line each shallow metal mold with food-grade baking parchment, leaving an overhang; use baking paper, not waxed paper or ordinary plastic film. Divide the warm mixture evenly between the two molds, pressing skin and meat together and removing gaps. Keep each layer no more than 3 cm thick. Fold the parchment loosely over the surface, add a clean flat plate and a stable sealed 1 kg weight to each. The press must sit level and never tip. These two shallow portions cool faster than one thick block; keep the sides exposed to cooling rather than wrapping the whole mold airtight.
-
Step 9
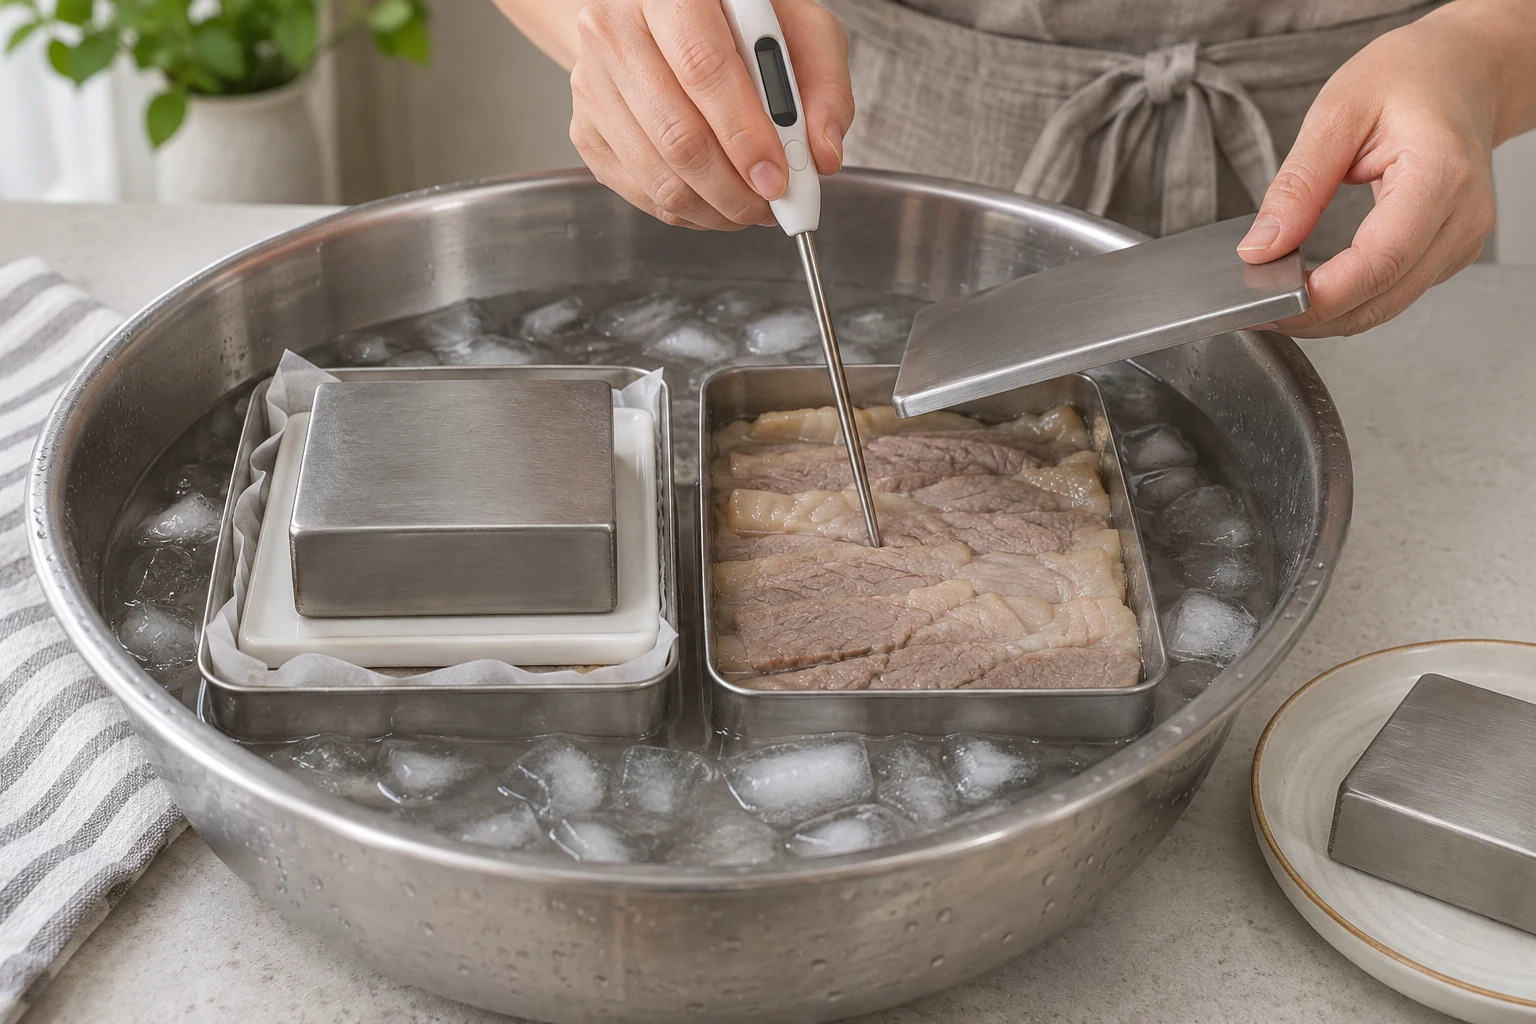
Immediately stand both weighted molds in a wide basin containing the 1000 g ice and 1800 ml cold water. Bath water stays outside the molds, below their rims, and never touches the food. Stir the bath around the molds and replenish melting ice. Check the center with a cleaned probe after about 30 minutes and then every 15 minutes, usually allowing 30–60 minutes. Cool to 21°C or below within 2 hours of removing the meat from heat. Count slicing and packing time too. Do not leave it weighted on the counter for hours. If it fails this cooling limit, discard rather than serving it cold.
-
Step 10
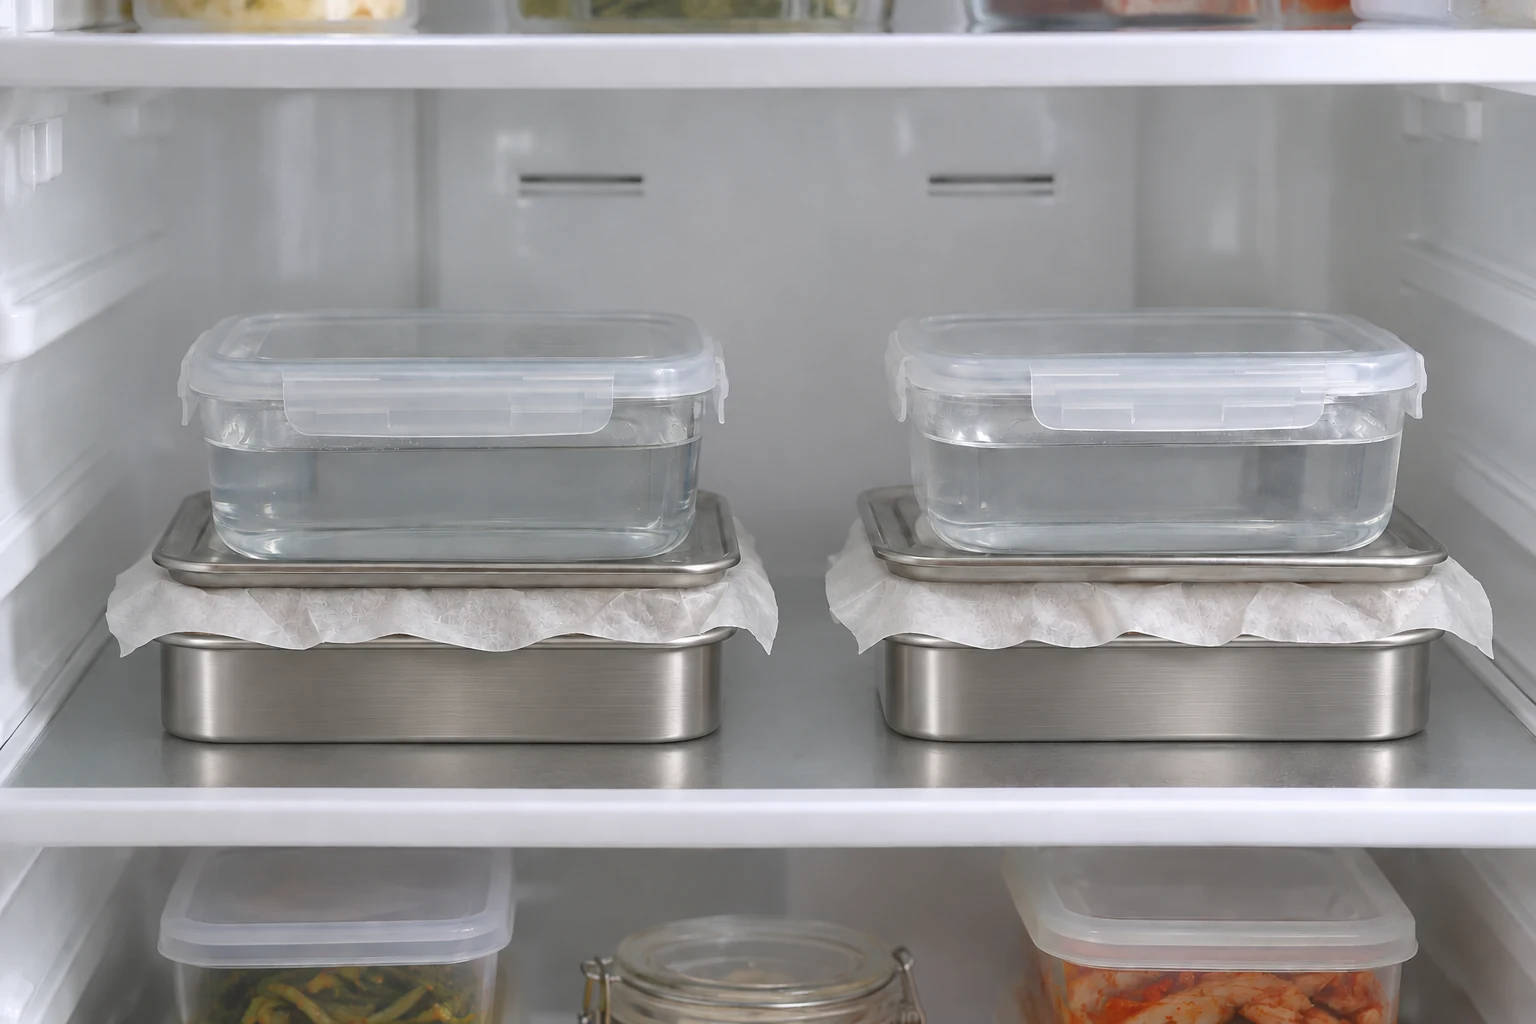
Transfer the shallow weighted molds to the cleared refrigerator at 4°C or below, leaving air space around them; do not stack. Continue chilling until the center is 4°C or colder, no later than 6 hours from removal from the cooking heat, checking with the cleaned probe. If this limit is missed, discard. Once cold, cover to protect the food and continue pressing for a total of at least 8 hours in the refrigerator, preferably overnight. The loaf must be firm throughout before slicing. Never rely on a cold outer surface or an overnight counter press as evidence of safe cooling.
-
Step 11
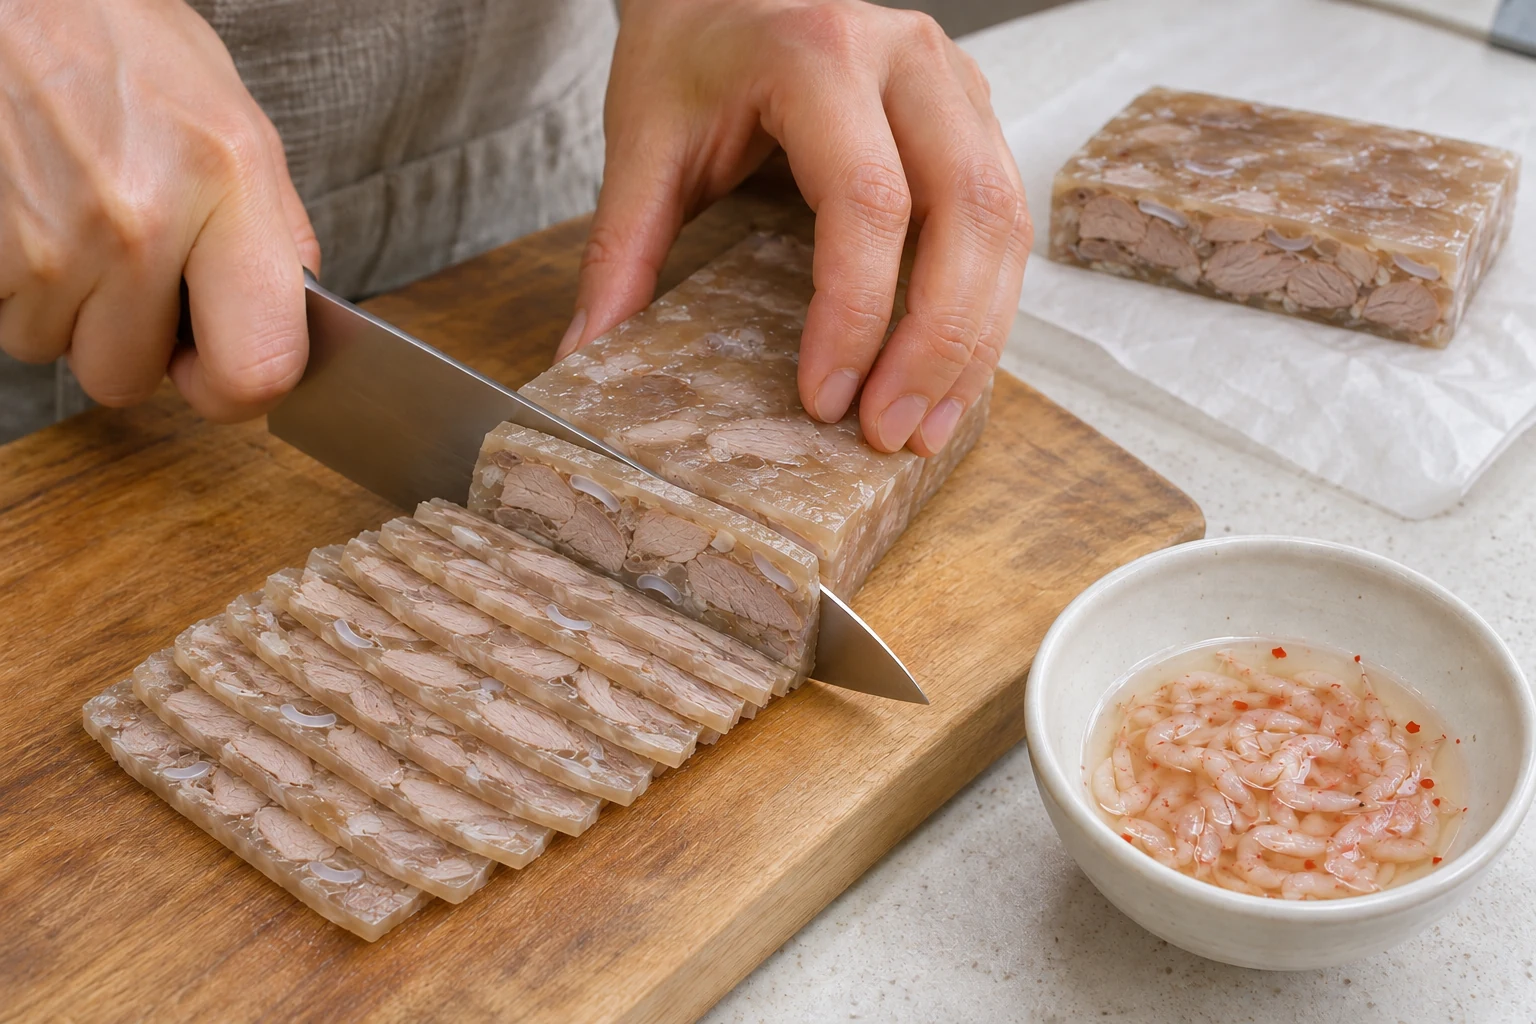
Just before serving, mix 1 tablespoon packaged saeujeot (20 g), 1 teaspoon vinegar and 1 tablespoon drinking water in a clean small bowl; add the optional ¼ teaspoon gochugaru. Keep the dip cold and separate. Remove weights, lift each cold loaf with the parchment and peel it off. Cut across with a sharp clean knife into 4–5 mm slices; cut long slices to comfortable bite-size pieces. Divide into four portions and offer a little dip alongside. Proper slices hold together, showing tender meat, translucent set skin and soft ear cartilage. If a safely chilled loaf crumbles, press it cold for another 2 hours and slice gently; do not leave it warm to soften.


Finished dish
A tablespoon is 15 ml, teaspoon 5 ml and small paper cup 180 ml. The 30 ml binding broth comes from the main pot, not extra raw stock. Blanching water, spent aromatics and external ice-bath water are not served. Keep the loaf shallow, at most 3 cm thick, and actively monitor cooling: 21°C within 2 hours and 4°C within 6 hours from taking it off the heat. These are deliberately conservative home targets. Use raw butcher-deboned skin-rich head meat, not a ready-cooked supermarket pyeonyuk product; leftover bones or bristles must be removed. Contains pork and soy, and the original dip contains shrimp; doenjang may contain wheat. Check labels. Refrigerate the finished loaves and dip separately at 4°C or below and use within 3 days of cooking. Take out only the serving portion. Once served, refrigerate within 2 hours, or 1 hour above 32°C, and discard anything left out longer. Cold pyeonyuk depends on thorough cooking, clean handling and rapid cooling; pressing does not preserve meat at room temperature.
Related recipes


Enjoy every bite
How to enjoy it
Serve thin cold slices with a small amount of salted-shrimp dip, adding a fresh vegetable side separately. Cut across skin and ear layers for easier bites and keep the remaining loaf refrigerated.

