Gangwon potato-starch dumplings (gamja-tteok)
Chewy, gently translucent potato-starch cakes filled with sweet red bean paste. This Gangwon-style snack starts with dry potato starch and boiling water, then is shaped and steamed. Makes 12 small cakes: four snack portions of three, in about 65 minutes.

Ingredients
4 servings

Everyday kitchen measurements
For 4 servings. Use a small 180 ml paper cup, a level eating spoon (about 15 ml) and a small teaspoon (about 5 ml).
How to fill the cup and spoons
Use the same cup and spoons throughout. Their sizes vary, so these amounts are approximate. Spoon flour in loosely and level the top without pressing. Measure vegetables after chopping, without packing them down. The amounts in g/ml are the original reference quantities. For part of a pack, use the specified pack weight and divide the contents evenly.
King Arthur Baking-
Essential
Required for this recipe; use the listed amount.
-
Essential
Required for this recipe; use the listed amount.
-
Substitute available
If Thick ready-to-eat sweet red bean paste is unavailable
- Use instead
- Thick ready-to-eat sweet mung bean paste
- Substitute quantity
- about 8 level tablespoons (120 g)Reference quantity: 120 g
If red bean paste is missing, use 120 g fully cooked sweet mung bean paste. Divide into the same twelve 10 g balls and fill the same way; steaming and resting times are unchanged. Do not substitute uncooked beans or a runny bean soup.
-
Essential
Required for this recipe; use the listed amount.
-
Essential
Required for this recipe; use the listed amount.
-
Essential
Required for this recipe; use the listed amount.
Tap each ingredient as you prepare it. Check product labels for egg, soy, sesame, wheat, fish or shellfish where relevant.
Step-by-step cooking
Check off a completed step to move to the next one. After the last step, you will move to the finished dish.
Completed steps are saved in this browser. Start over to clear this recipe’s progress.
-
Step 1
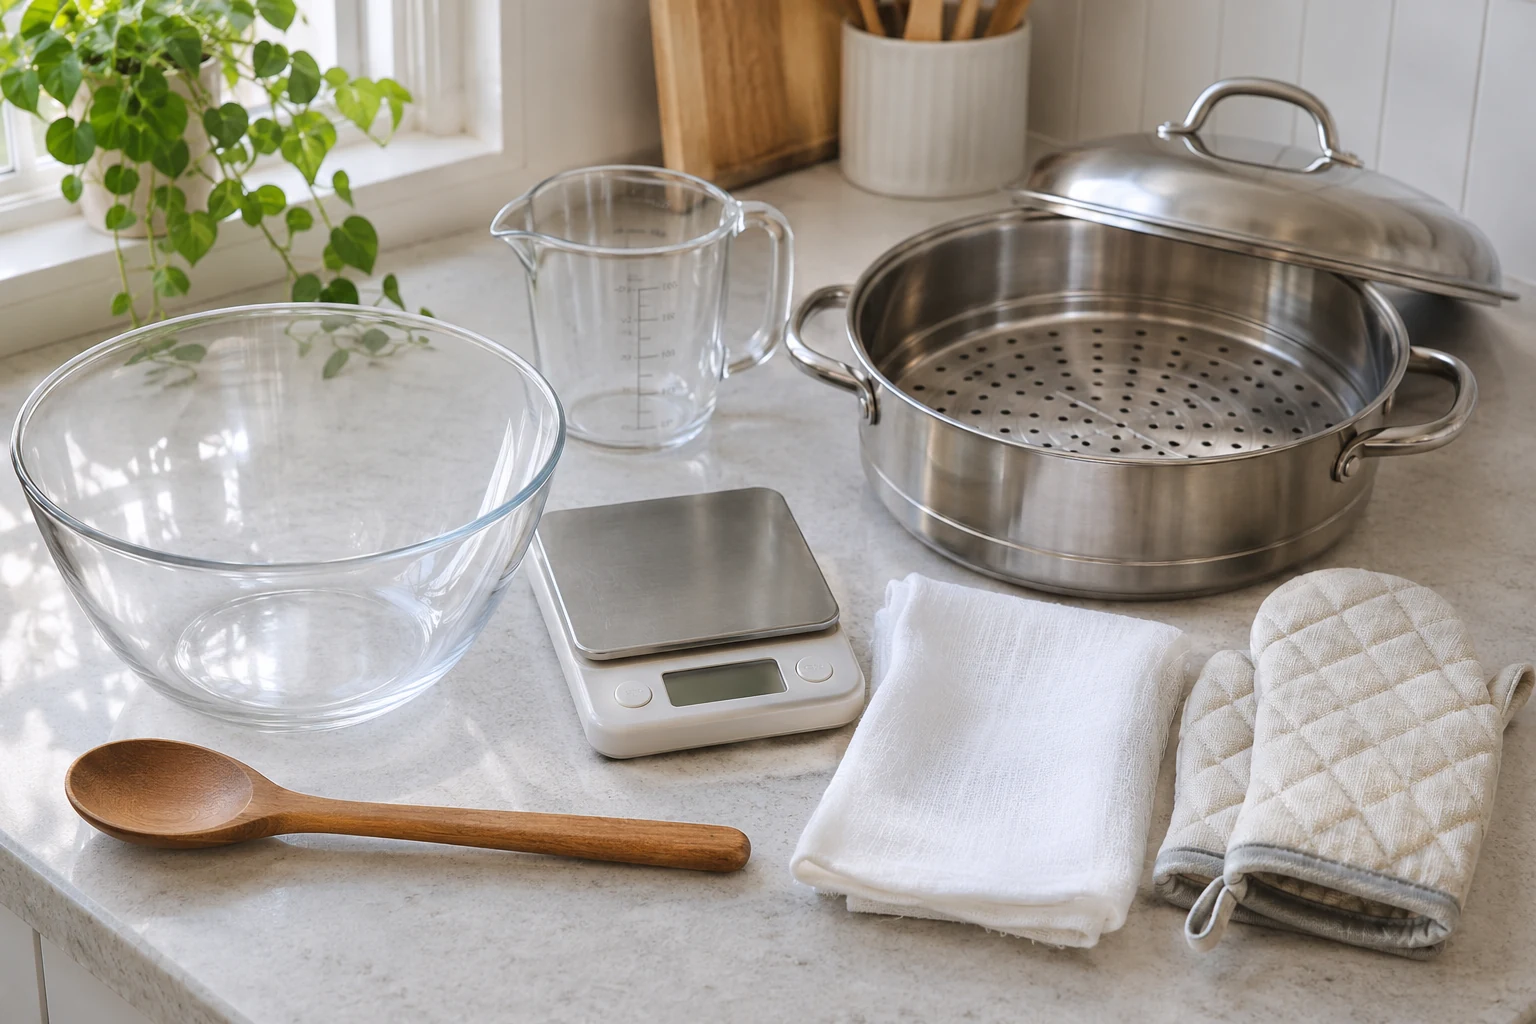
Allow about 35 minutes for preparation, 25 minutes for steaming and resting, and 5 minutes to cool. Prepare a heatproof mixing bowl, sturdy spoon, kitchen scale, measuring cup, lidded steamer at least 24 cm wide, a clean food-safe cloth or perforated steamer liner, and heatproof gloves. Check the packet: use 100% potato starch. Whole potato flour, instant mashed potato and cornstarch are not interchangeable in this dough. No raw potatoes or rice flour are needed.
-
Step 2
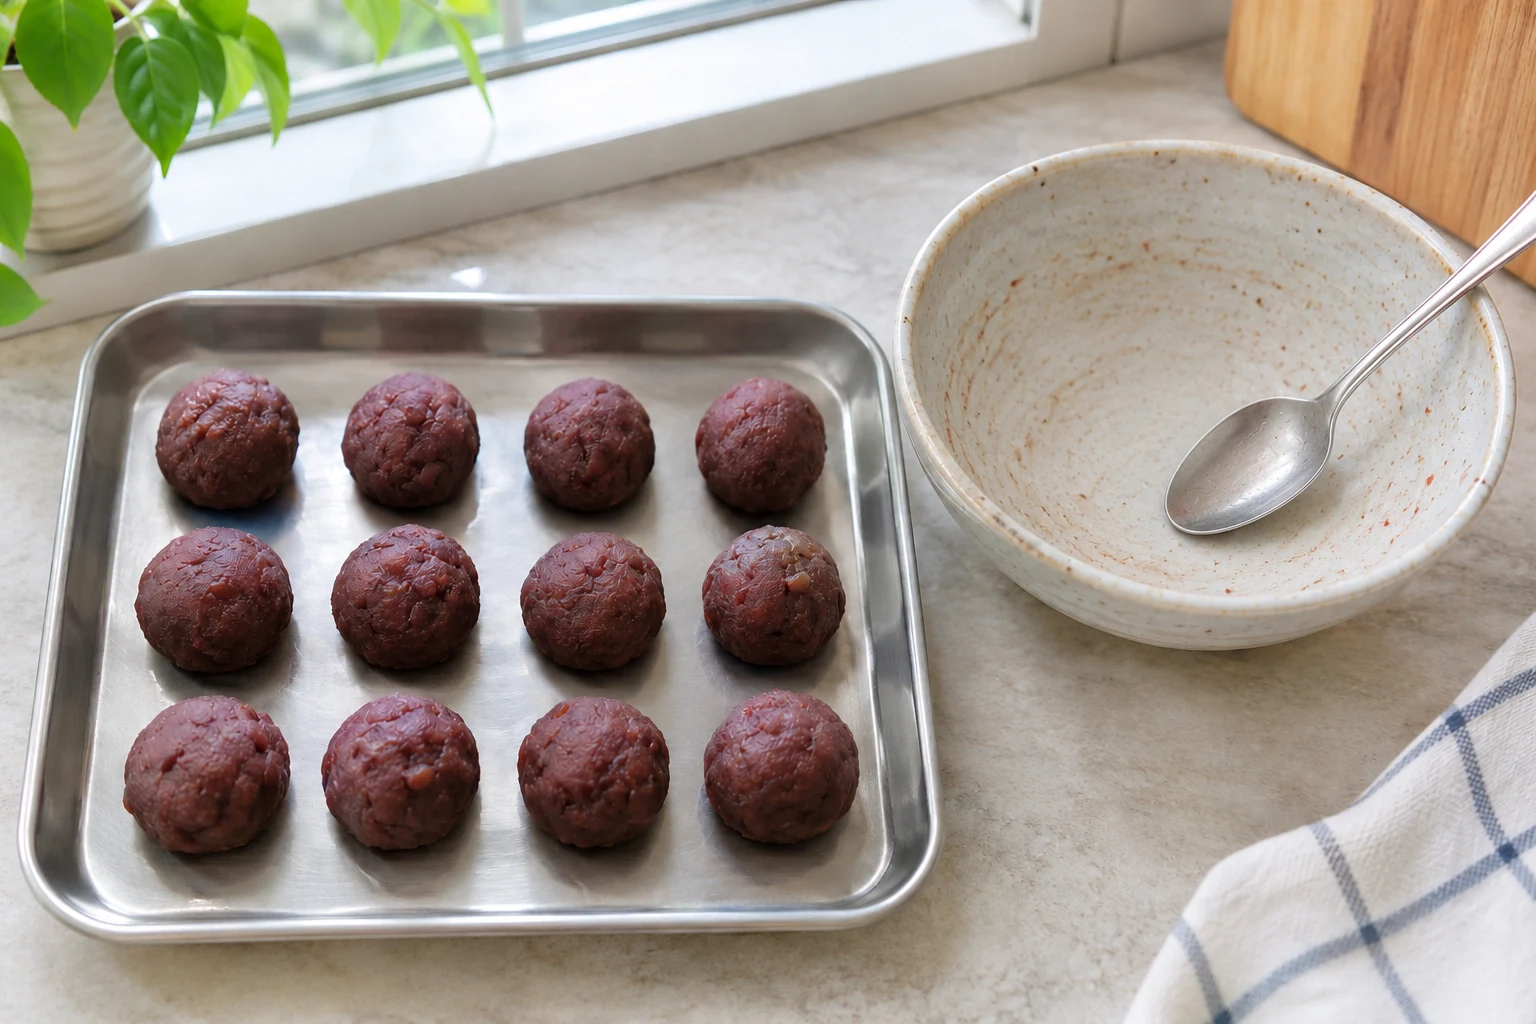
Use fully cooked, ready-to-eat red bean paste, not dry beans. Divide 120 g into 12 firm portions of 10 g and roll into small balls. If the paste flows rather than holding its shape, stir it in a small pan on low heat for 2–3 minutes to dry it, then cool completely before portioning. The filling must be cool so it will not melt through the wrapper. Keep covered while making the dough.
-
Step 3
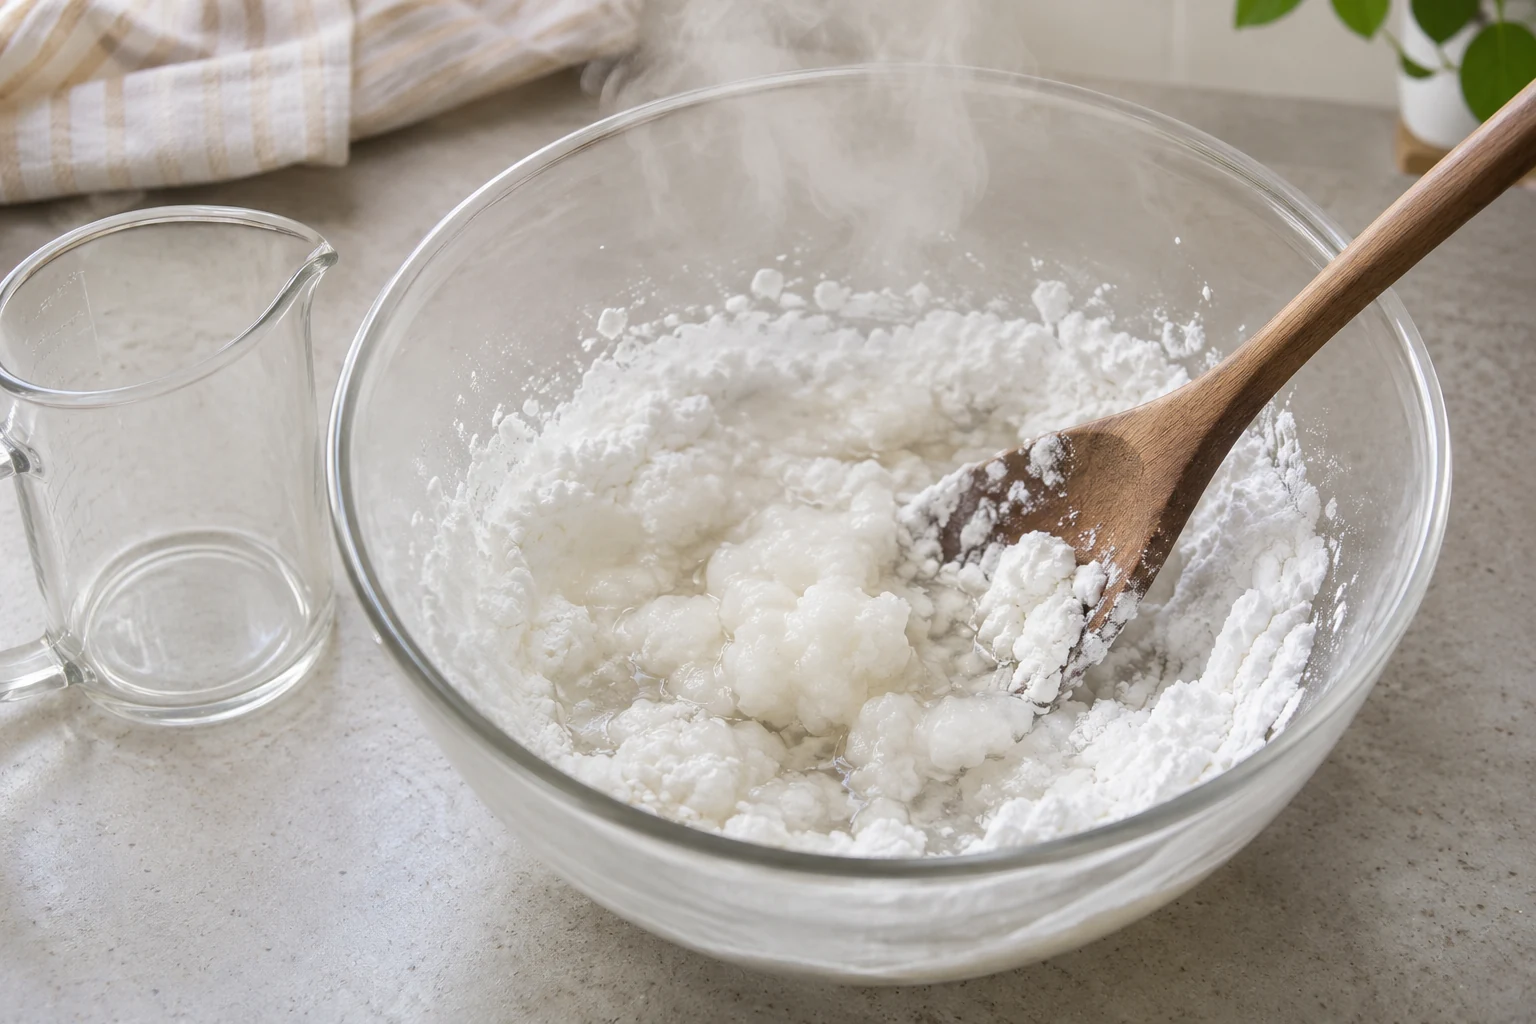
Put the 200 g potato starch in the heatproof bowl. Dissolve ¼ teaspoon salt in 180 ml freshly boiling drinking water and immediately pour it over the starch while stirring with the sturdy spoon. Stir and press for 1–2 minutes until the mixture forms moist clumps with no loose dry pockets. This is hot-water dough, called ikbanjuk: some starch thickens at once and binds the rest. Keep hands away from the boiling water and hot paste.
-
Step 4
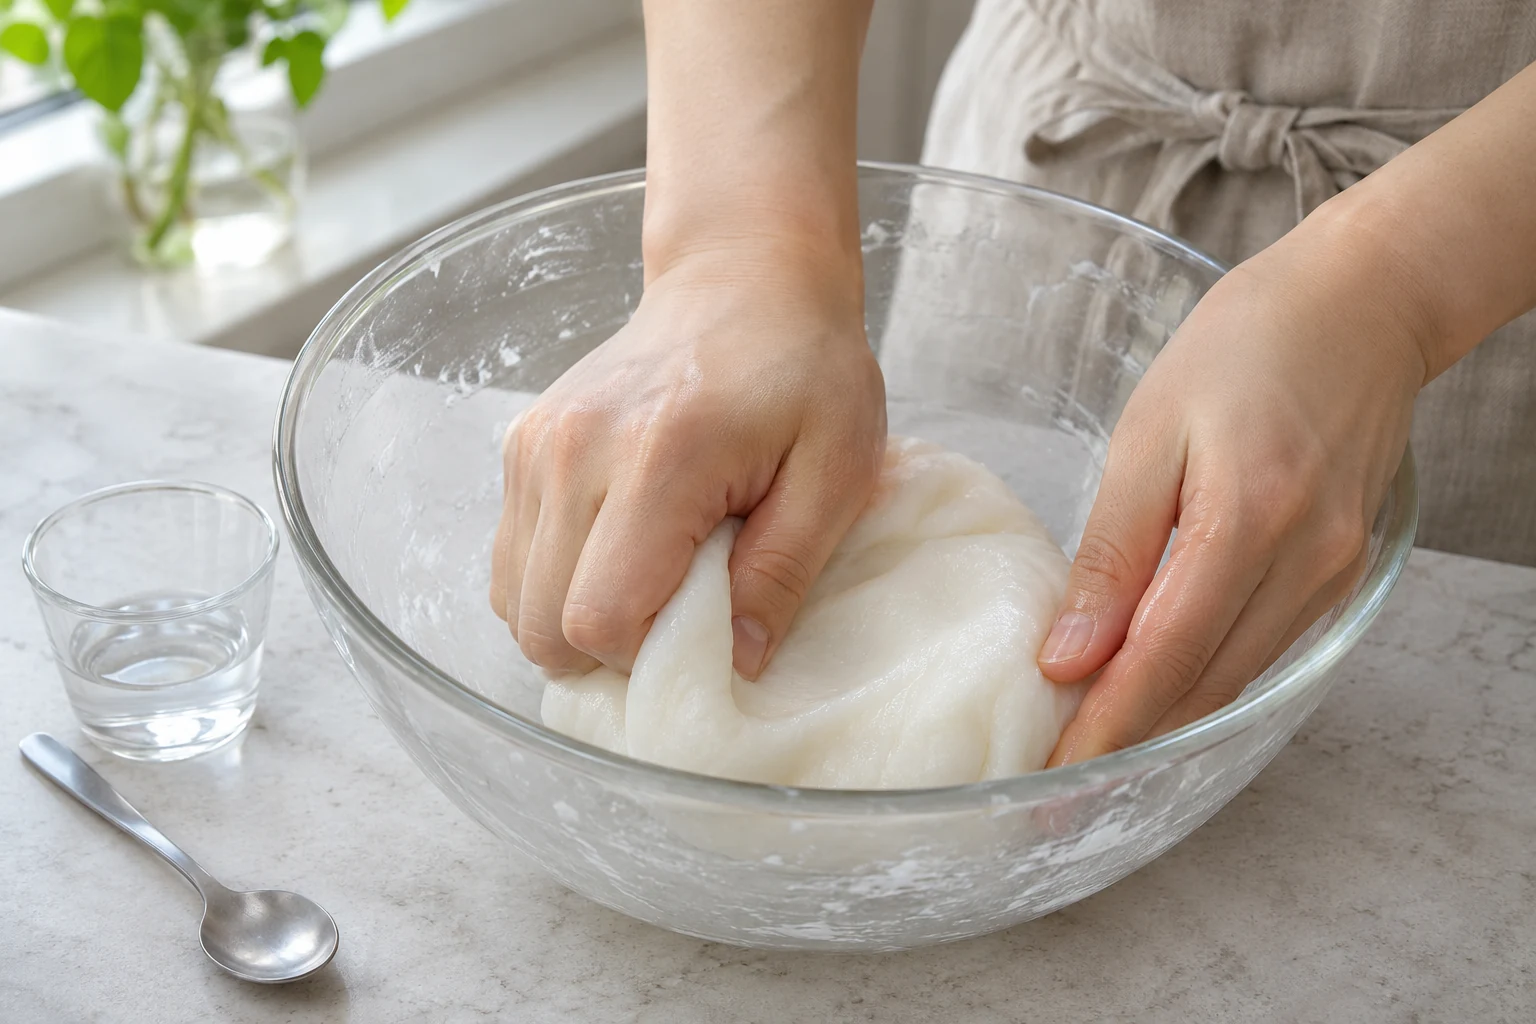
Let the dough cool for about 2 minutes, just until safe to touch, then knead for 2 minutes into a smooth, pliable mass. If it cracks when bent, add reserved hot water 1 teaspoon (5 ml) at a time, kneading after each addition, up to 30 ml total. If very sticky, cover and wait 2 minutes before kneading again; do not pour in more water. Keep covered so the surface does not crust. Do not taste raw dough.
-
Step 5
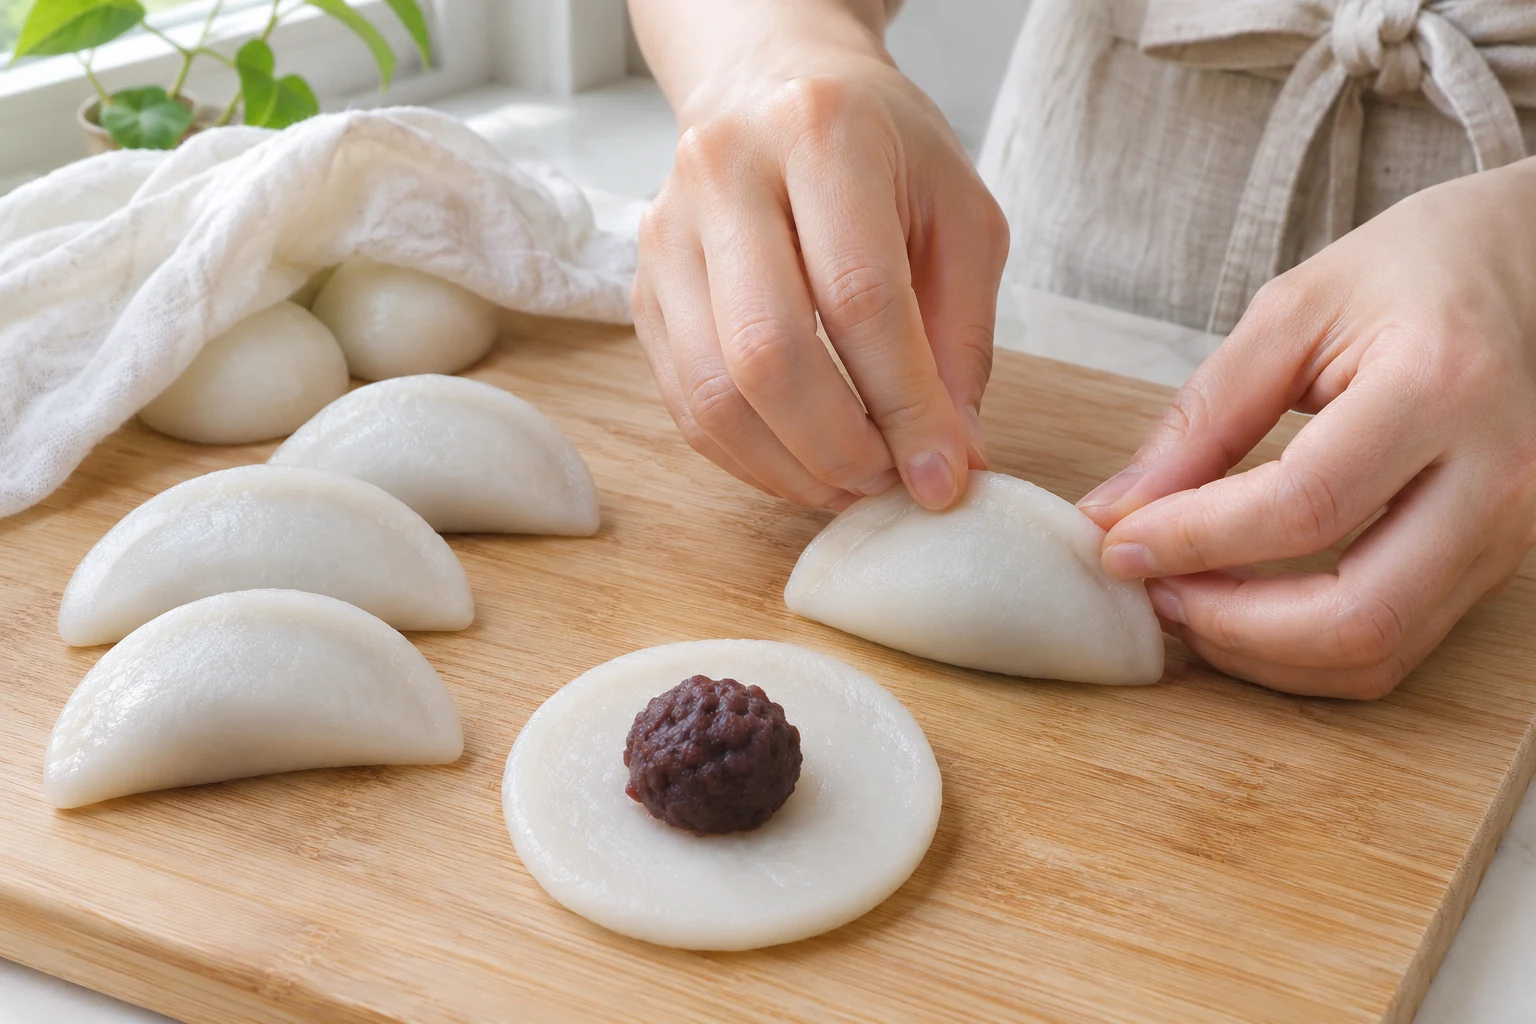
Divide the dough into 12 equal pieces, approximately 32 g each before adjustment water. Keep unused pieces covered. Flatten one piece into a 7 cm disc with a slightly thicker center and edges about 2–3 mm thick. Place one 10 g bean ball in the middle. Fold into a half-moon, press out trapped air and pinch the seam completely shut. Smooth cracks with damp fingertips. Keep the finished cake about 2–2.5 cm thick; do not overfill. Repeat for all 12.
-
Step 6
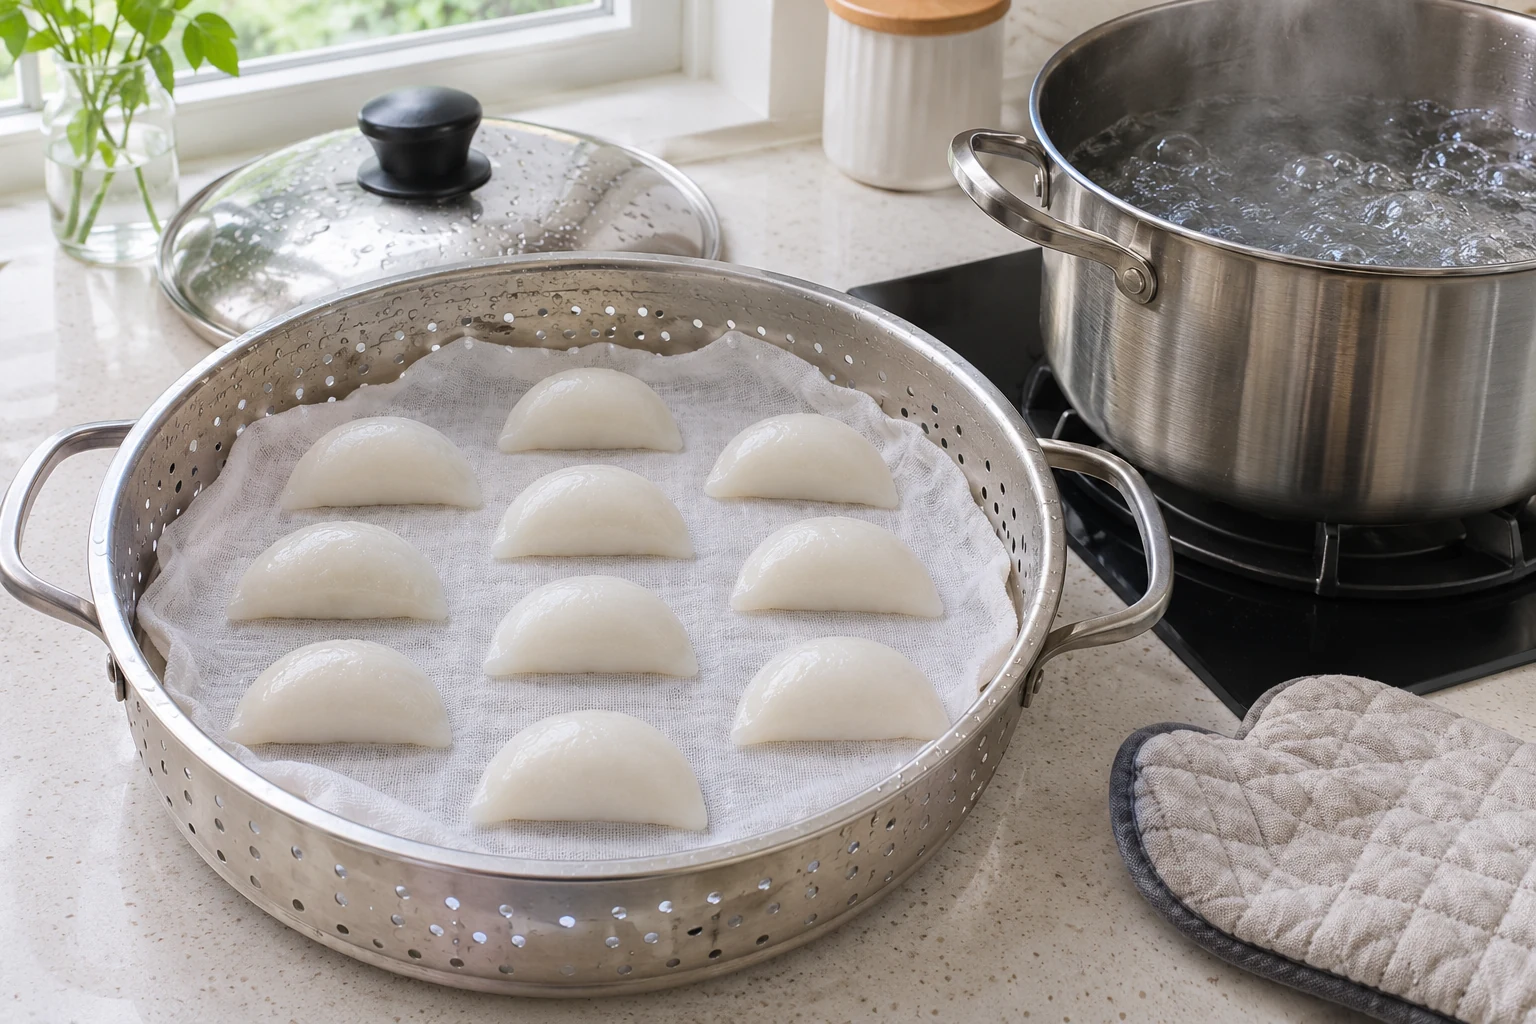
Pour 720 ml water into the steamer pot, or enough to stay about 2 cm below the rack without touching the cakes. Wet a clean steamer cloth with drinking water and wring it out, or use a perforated food-safe liner. Place the cakes on the lined rack with 2 cm gaps, seam upward, in one layer. Bring the water to a strong boil over high heat before setting the rack over it; work in batches if they do not fit.
-
Step 7
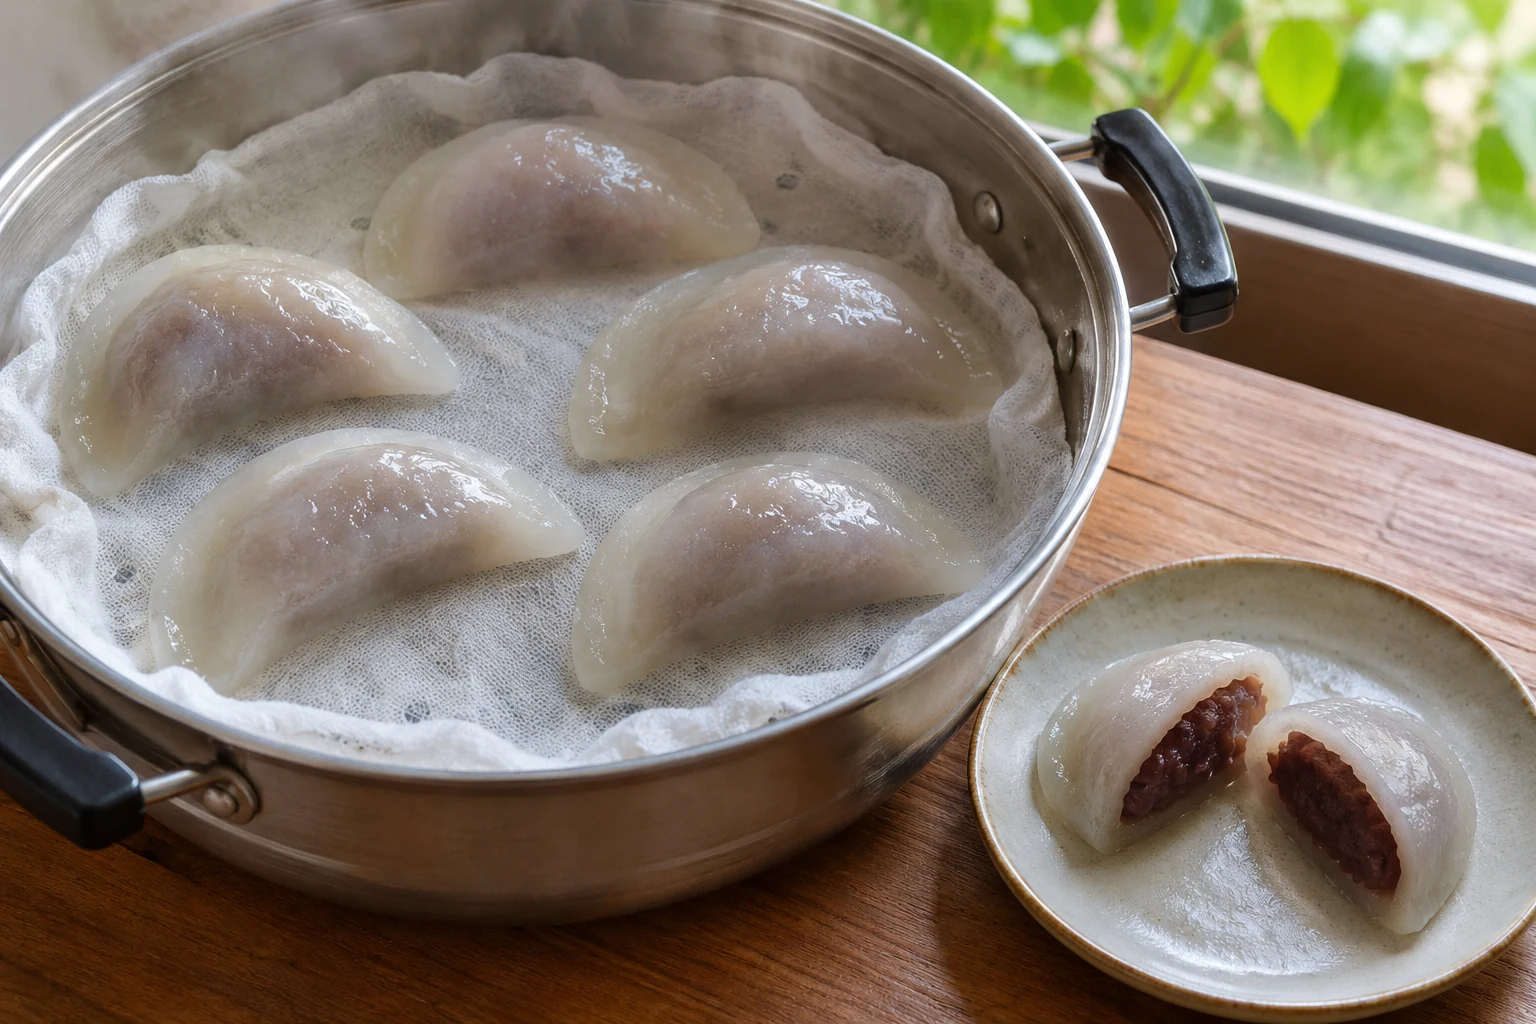
Cover and steam over medium-high heat with steady visible steam for 20 minutes, starting when steam returns after loading. Keep the water boiling without splashing onto the cakes; add boiling water to the pot if it is running low. Turn off the heat and leave covered for 5 minutes. Lift the lid away from your face. Cut one cake: the wrapper should be elastic and slightly translucent all the way through, without a chalky dry center. If needed, steam 5 minutes more and check again.
-
Step 8
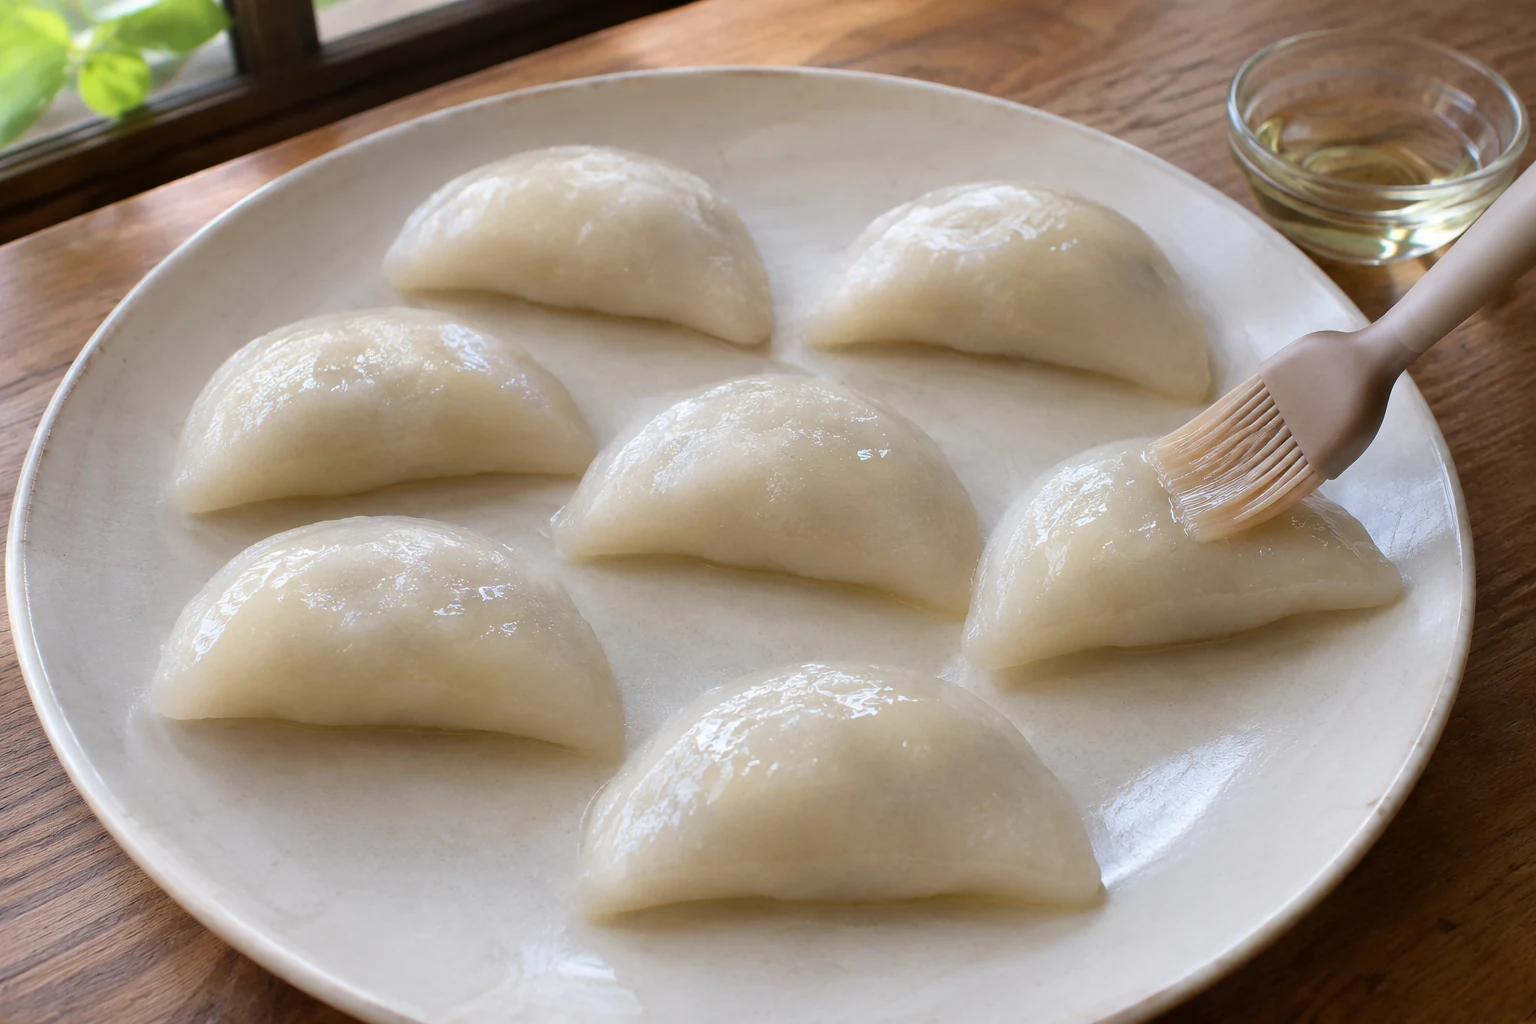
Brush the surfaces very lightly with the total 1 teaspoon neutral oil to prevent sticking. Separate on a plate and cool for at least 5 minutes before eating; the bean center can be much hotter than the surface. Serve three small cakes per snack portion. Cut into smaller bites and chew thoroughly because the wrapper is sticky and elastic. Do not stack warm cakes tightly or they will bond together.


Finished dish
The starch-to-water starting ratio is 200 g to 180 ml; starch brands absorb differently, so use the measured 30 ml reserve only as instructed. A tablespoon is 15 ml, a teaspoon 5 ml and a small paper cup 180 ml. Check starch and bean-paste labels for allergens and added ingredients; the plain recipe has no wheat or dairy ingredients. Chilling makes starch cakes firm, which is normal. Refrigerate leftovers separately in a covered container within 2 hours, or 1 hour above 32°C, at 4°C or below; use within 1 day. Re-steam about 5–8 minutes, until soft and 74°C throughout, then cool briefly. Steaming time may be longer for very cold cakes. Never leave filled cakes out overnight. The 65-minute estimate assumes one steaming batch. Add about 20 minutes for each additional batch; keep unsteamed cakes covered while waiting.
Related recipes


Enjoy every bite
How to enjoy it
Eat warm, after the filling has cooled enough to bite safely, with unsweetened tea. The surface should be tender and the center chewy, not crunchy or fluffy like bread.

