Tteok Kkochi — Sweet and Spicy Rice Cake Skewers
Soft rice cakes with a lightly crisp outside and a familiar sweet ketchup-gochujang glaze. Make the classic street snack in a frying pan, with no deep-frying.
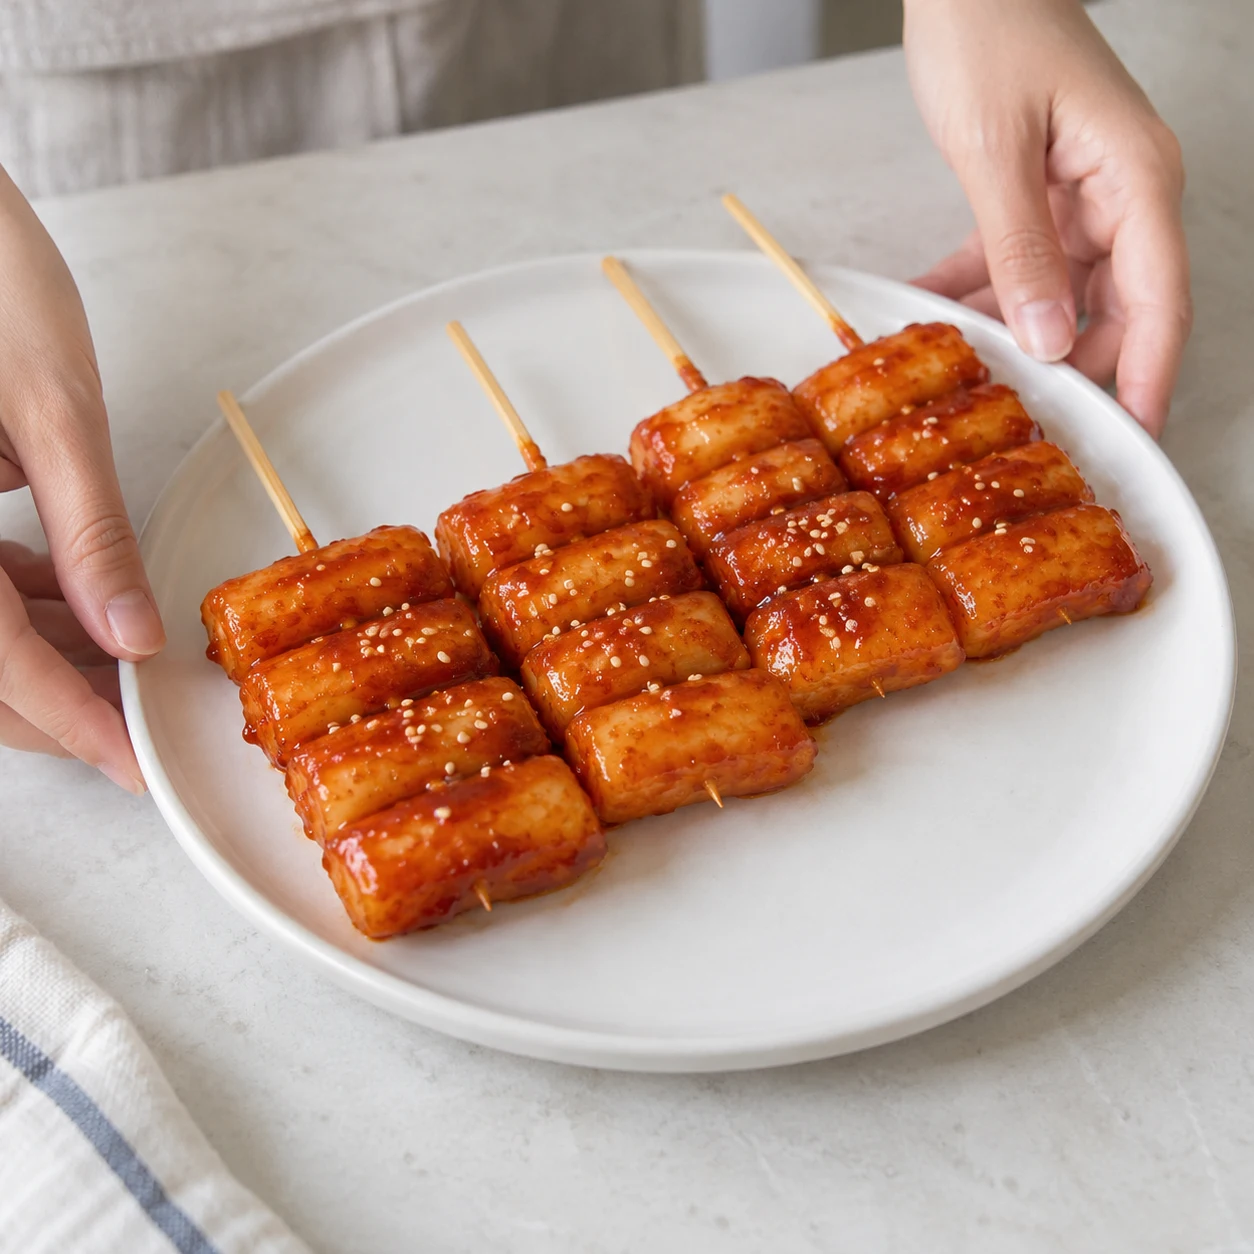
AI-generated cooking illustrations. Follow the written quantities and instructions.
Ingredients
2 servings
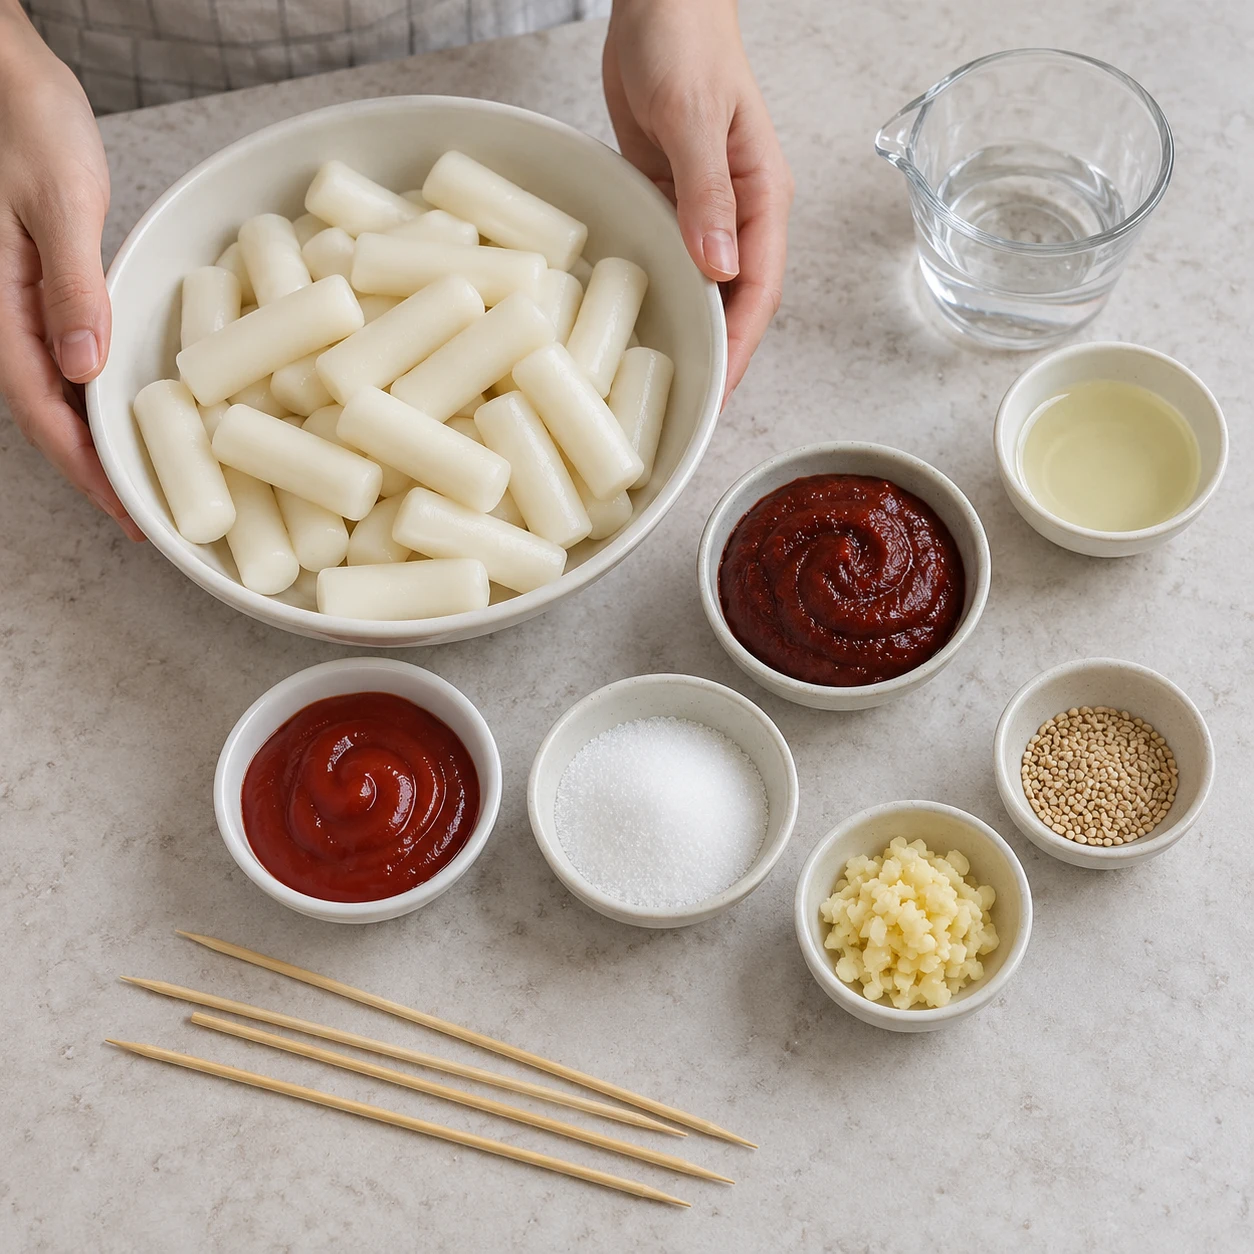
Everyday kitchen measurements
For 2 servings. Use a small 180 ml paper cup, a level eating spoon (about 15 ml) and a small teaspoon (about 5 ml).
How to fill the cup and spoons
Use the same cup and spoons throughout. Their sizes vary, so these amounts are approximate. Spoon flour in loosely and level the top without pressing. Measure vegetables after chopping, without packing them down. The amounts in g/ml are the original reference quantities. For part of a pack, use the specified pack weight and divide the contents evenly.
King Arthur Baking-
Essential
Use plain rice cakes sold for tteokbokki, not sweet filled cakes. Soft fresh rice cakes need no blanching; firm chilled ones need the brief softening and careful drying described in step 1. Do not deep-fry hard or frozen rice cakes.
-
Essential
This makes the familiar sweet and tangy street-snack sauce. Use ordinary tomato ketchup; plain tomato puree is less sweet and needs a different seasoning balance.
-
Essential
Use thick Korean chili paste. Choose a mild variety, or use only ½ small teaspoon for a gentler sauce. For a fully non-spicy version, use the separate soy-sauce rice cake skewer recipe.
-
Substitute available
If Sugar is unavailable
- Use instead
- Maple syrup
- Substitute quantity
- 3 small teaspoonsReference quantity: 15 ml
Mix into the sauce instead of sugar. The flavor is slightly different and the sauce may take an extra 1–2 minutes of gentle bubbling to coat the food; stir and stop before it scorches.
-
Essential
Mix into the sauce in step 2. The additional water used for softening rice cakes is drained and is not part of this sauce amount.
-
Substitute available
If Neutral cooking oil is unavailable
- Use instead
- Sunflower oil
- Substitute quantity
- 2 small teaspoonsReference quantity: 10 ml
Use the same amount in the pan. Choose a plain oil suitable for cooking; do not use butter, which browns and burns sooner.
-
Optional
Omit from the sauce in step 2 if unavailable or if you want a very simple ketchup flavor. Keep the other amounts unchanged.
-
Optional
Skip the final garnish if unavailable or unsuitable for you. No nuts or other garnish are necessary.
Tap each ingredient as you prepare it. Check product labels for egg, soy, sesame, wheat, fish or shellfish where relevant.
Step-by-step cooking
-
Step 1
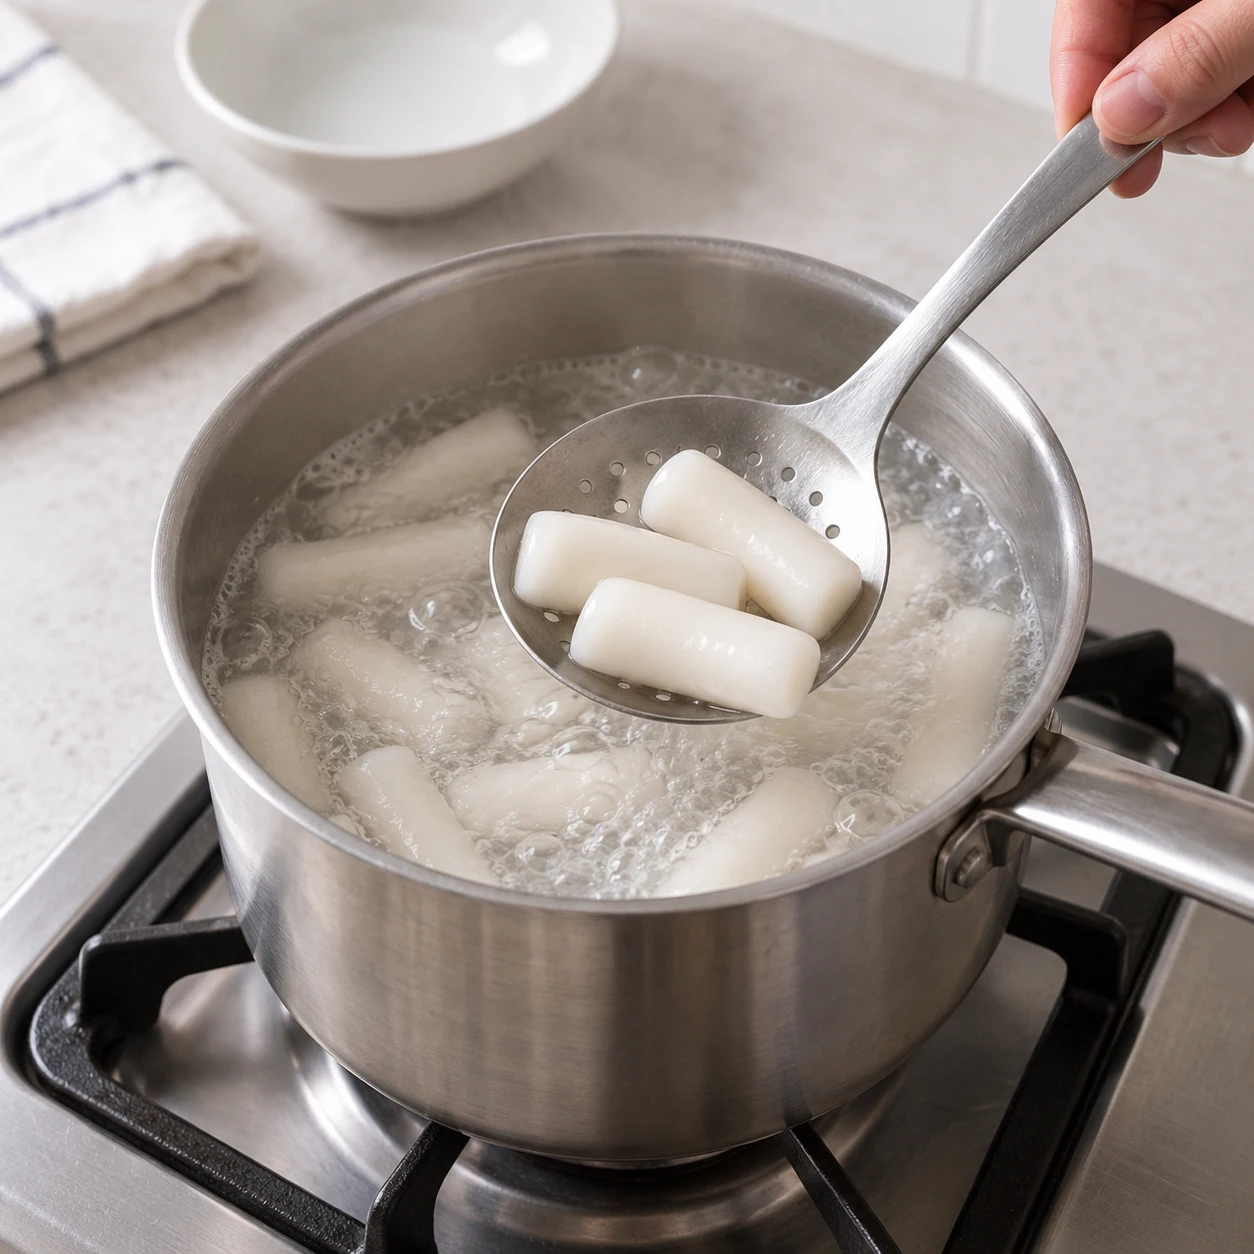
Separate the rice cakes. If firm from refrigeration, simmer them in boiling water for 30–60 seconds, just until they bend without splitting. Drain, cool enough to handle, and pat completely dry with kitchen paper. Thaw frozen rice cakes in the refrigerator first and follow the packet instructions if they require longer cooking. Fresh soft rice cakes can simply be separated and dried.
-
Step 2
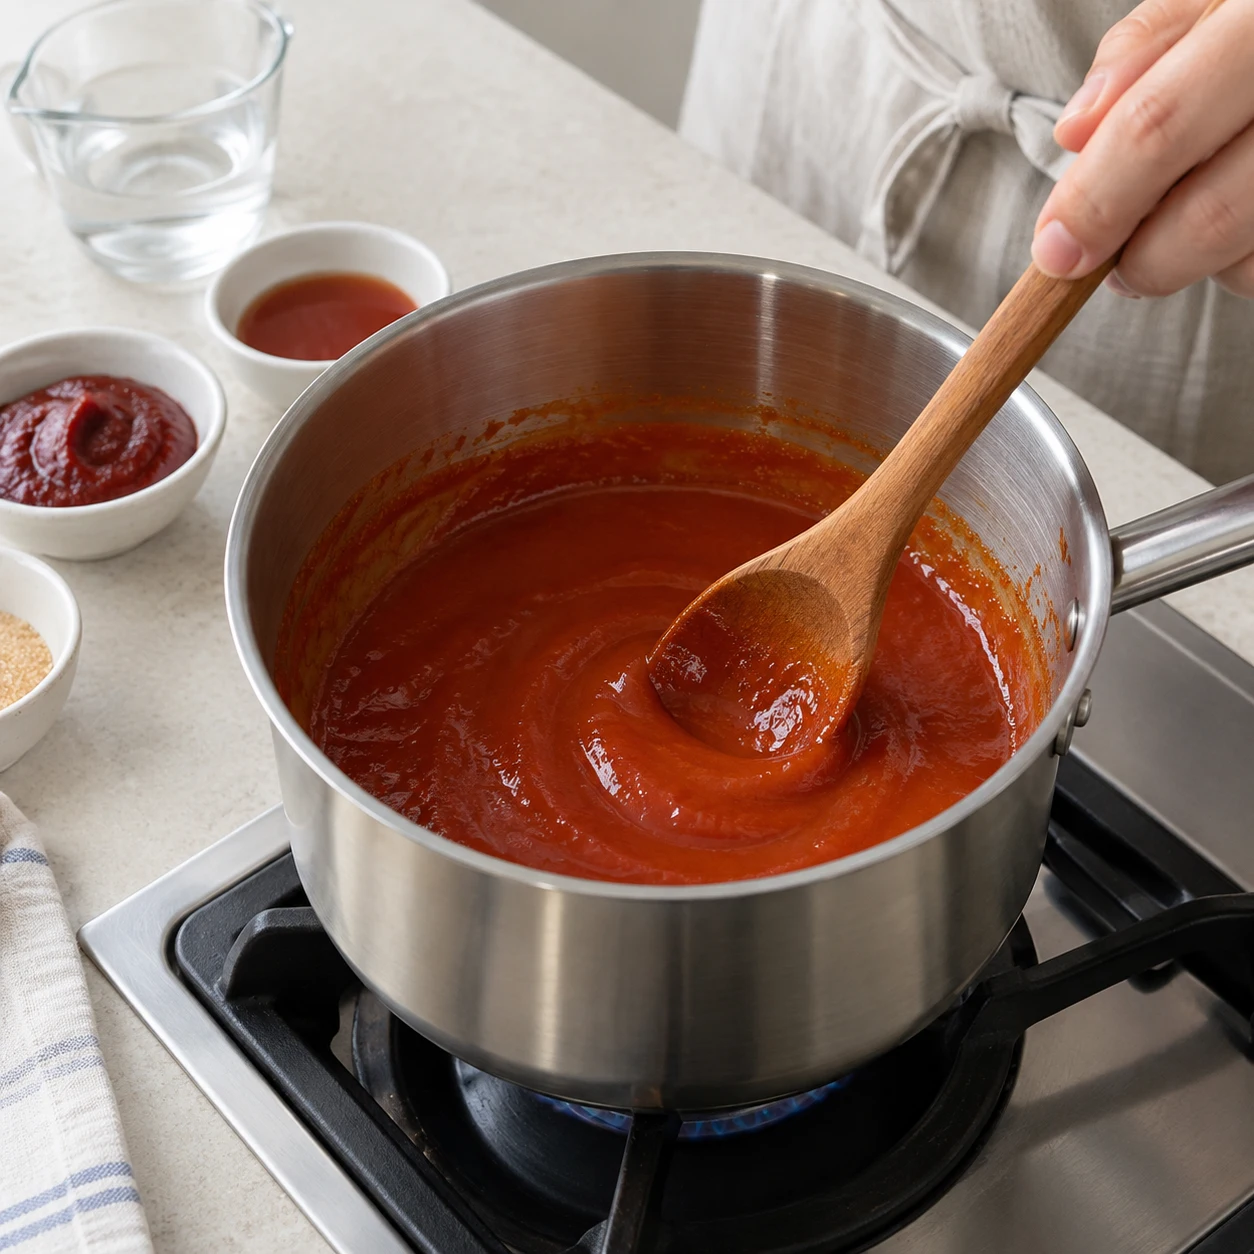
In a small saucepan, mix 2 level eating spoons ketchup, 1 small teaspoon gochujang, 1 level eating spoon sugar, 1 level eating spoon water and the optional ½ small teaspoon minced garlic. Stir over low heat for 1–2 minutes, until the sugar dissolves and the sauce looks smooth. Turn off the heat; do not reduce it to a thick burnt syrup.
-
Step 3
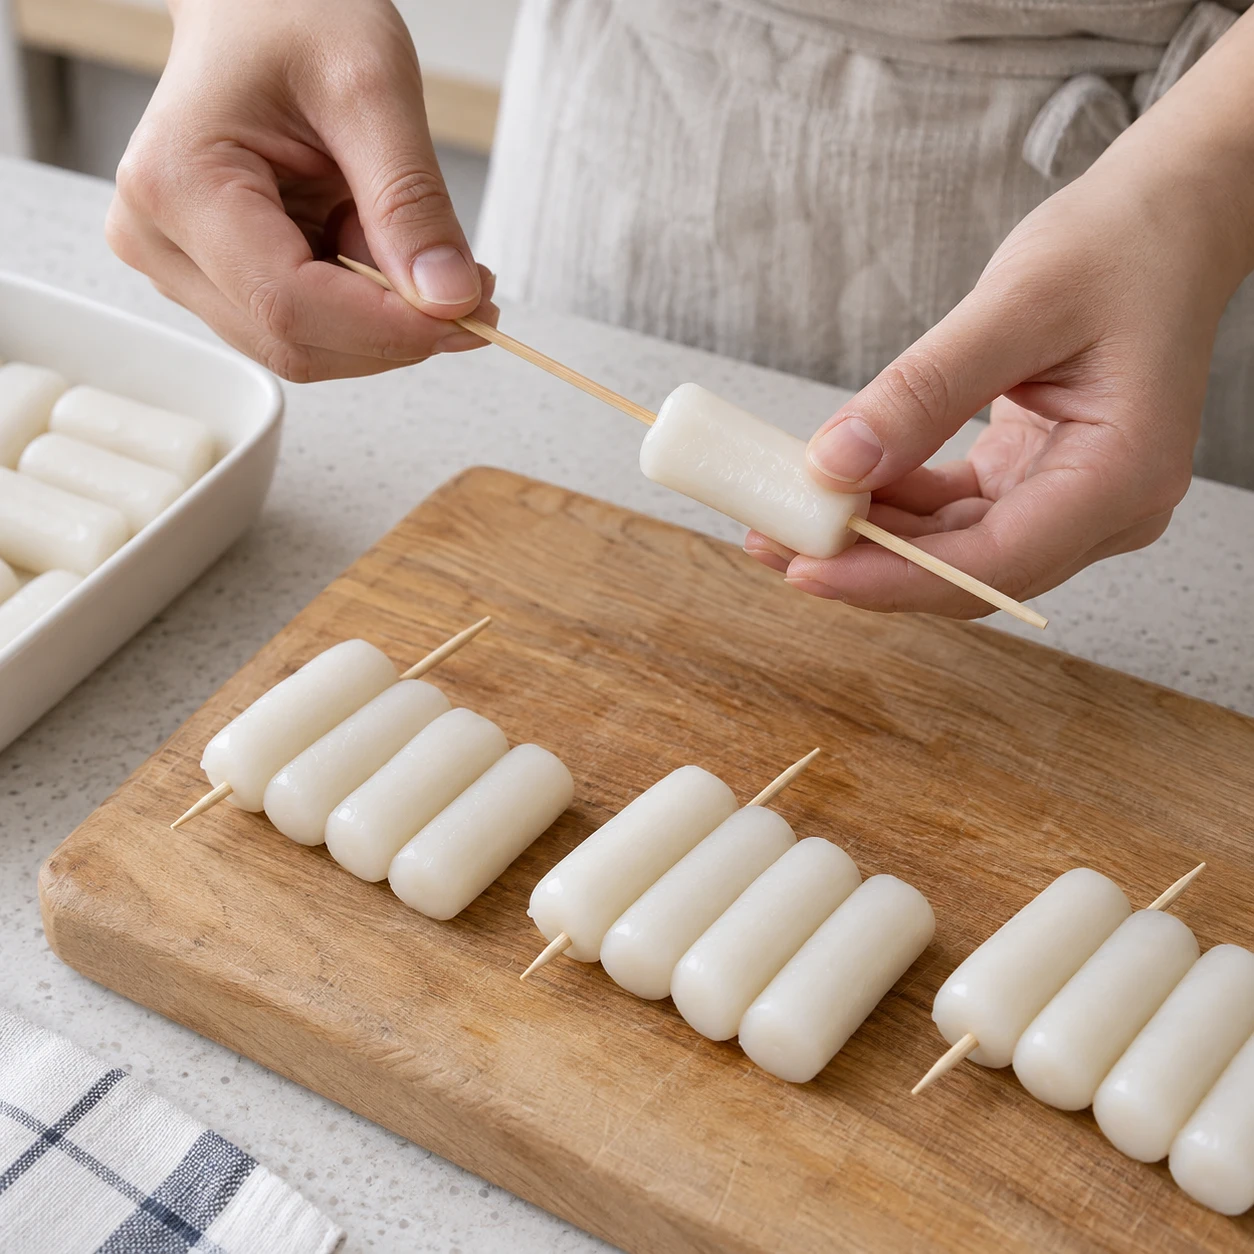
Divide the rice cakes between 4 short skewers, threading through their sides so the cylinders sit alongside one another. Leave a small handle and make sure each skewer can lie flat in your frying pan. If you have no skewers, leave the rice cakes loose; the frying and coating method stays the same.
-
Step 4
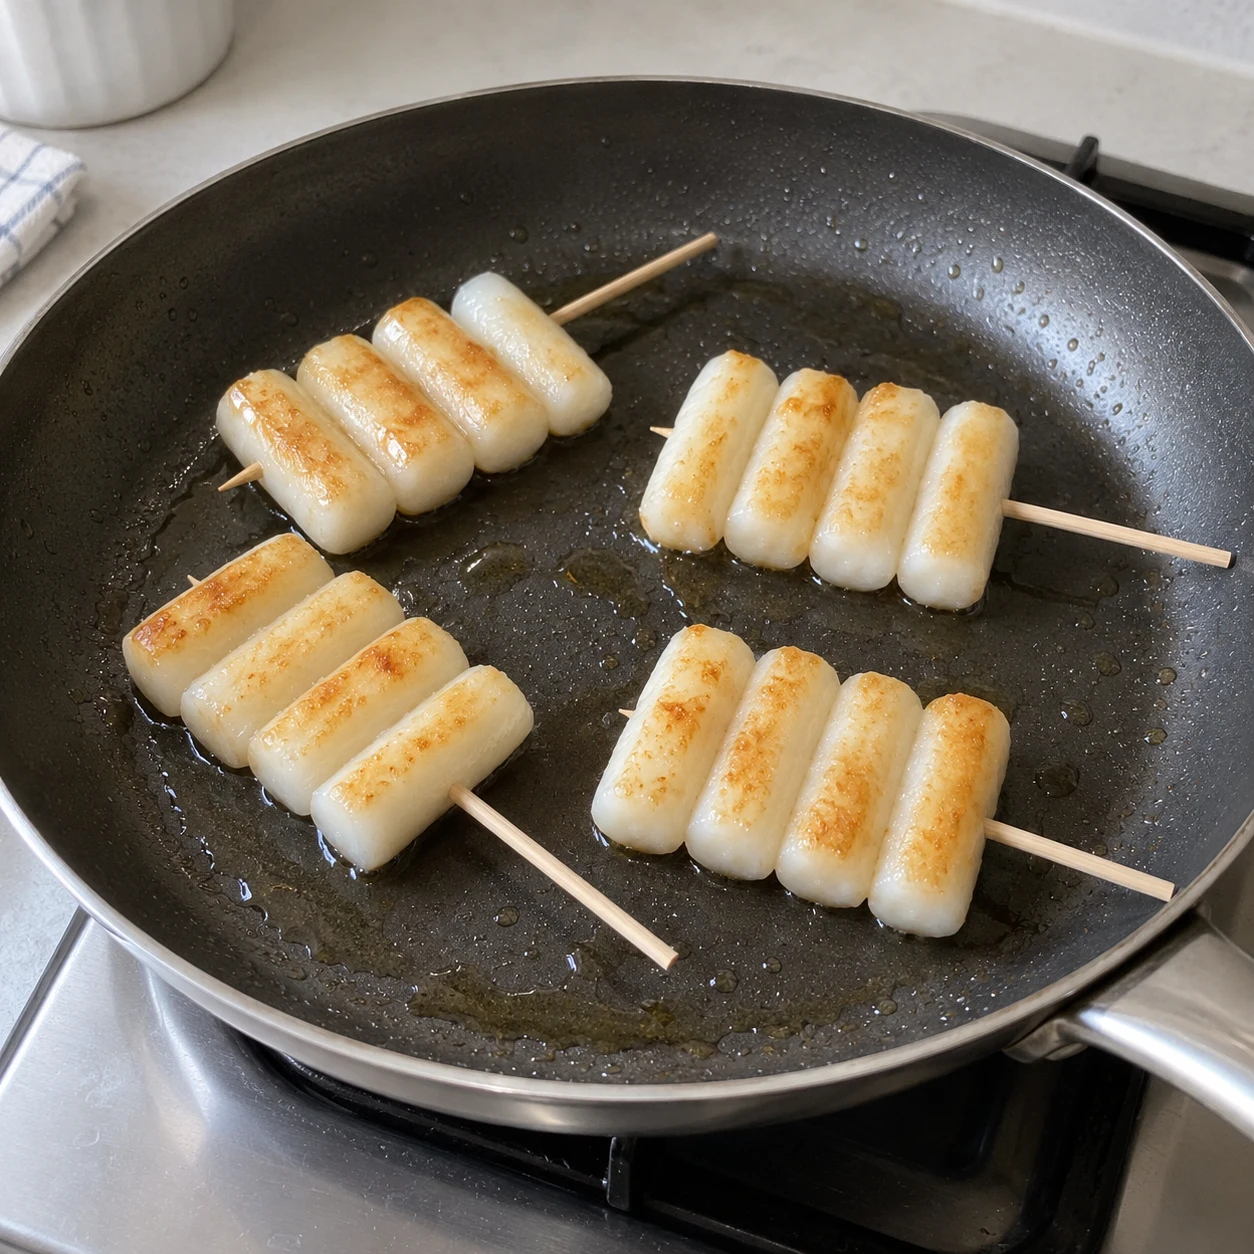
Warm 2 small teaspoons cooking oil in a wide frying pan over medium heat. Add the dry rice cakes in a single layer and cook for 2–3 minutes. Turn carefully and cook the other side for another 2–3 minutes, until a few golden patches appear. Keep the heat moderate and use tongs; very high heat can make rice cakes split.
-
Step 5
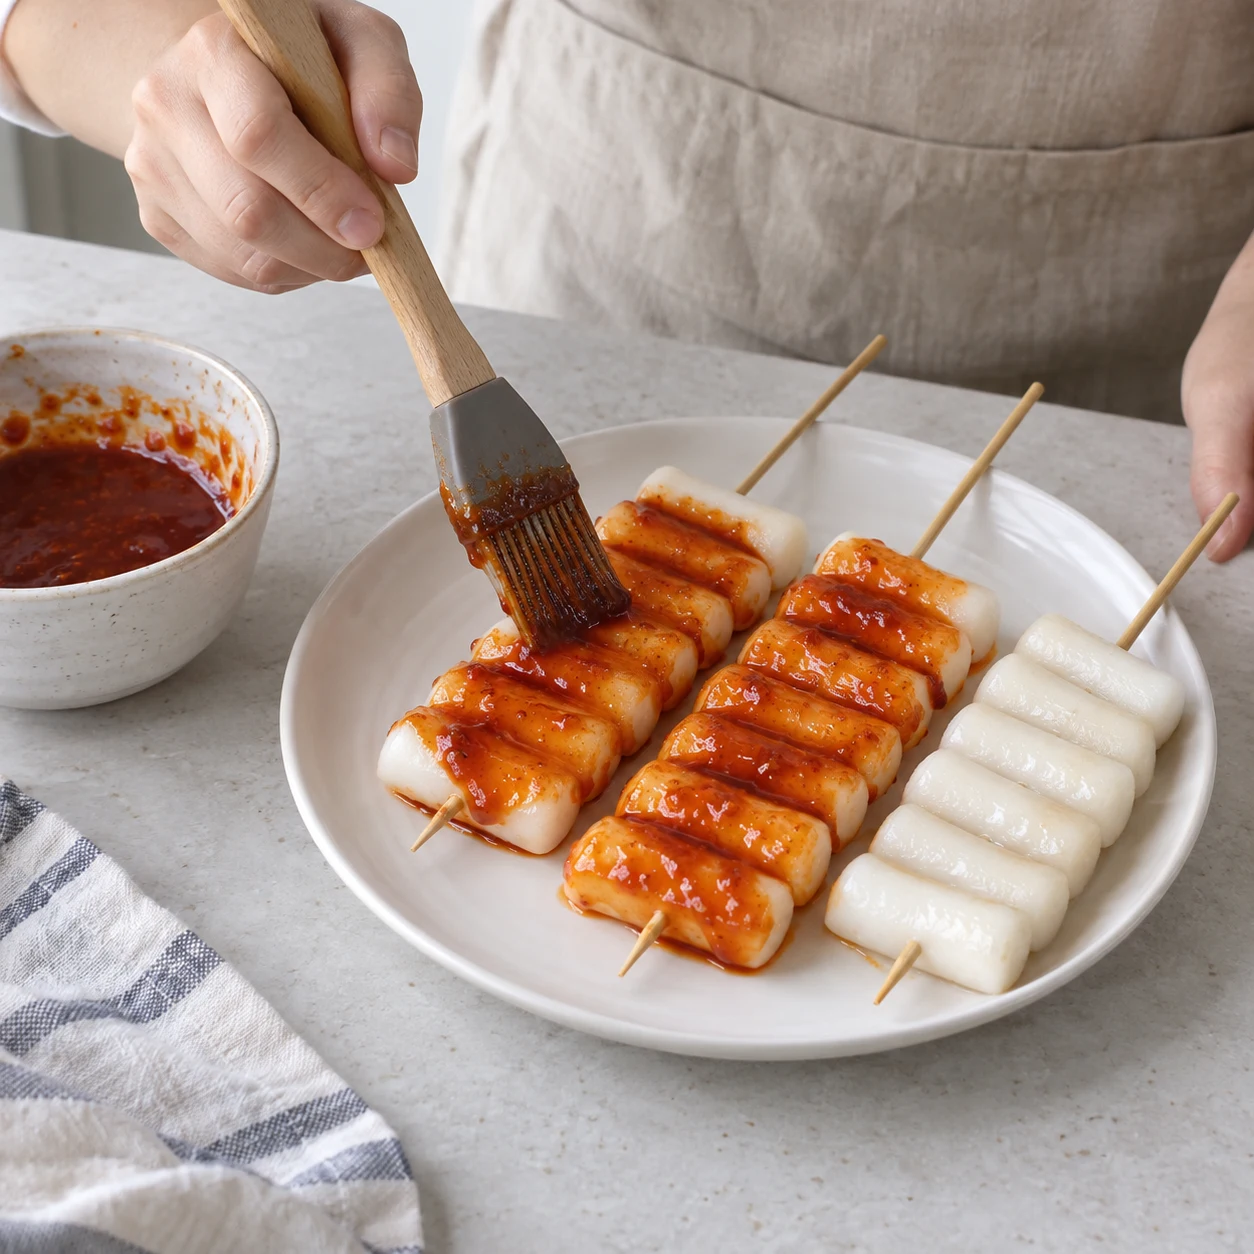
Transfer the hot rice cakes to a clean plate. Brush or spoon the prepared sauce over both sides, using a light even coat. If the sauce became too stiff, loosen it with 1 small teaspoon water over low heat before brushing. Do not leave the sugary glazed skewers frying in the hot pan.
-
Step 6
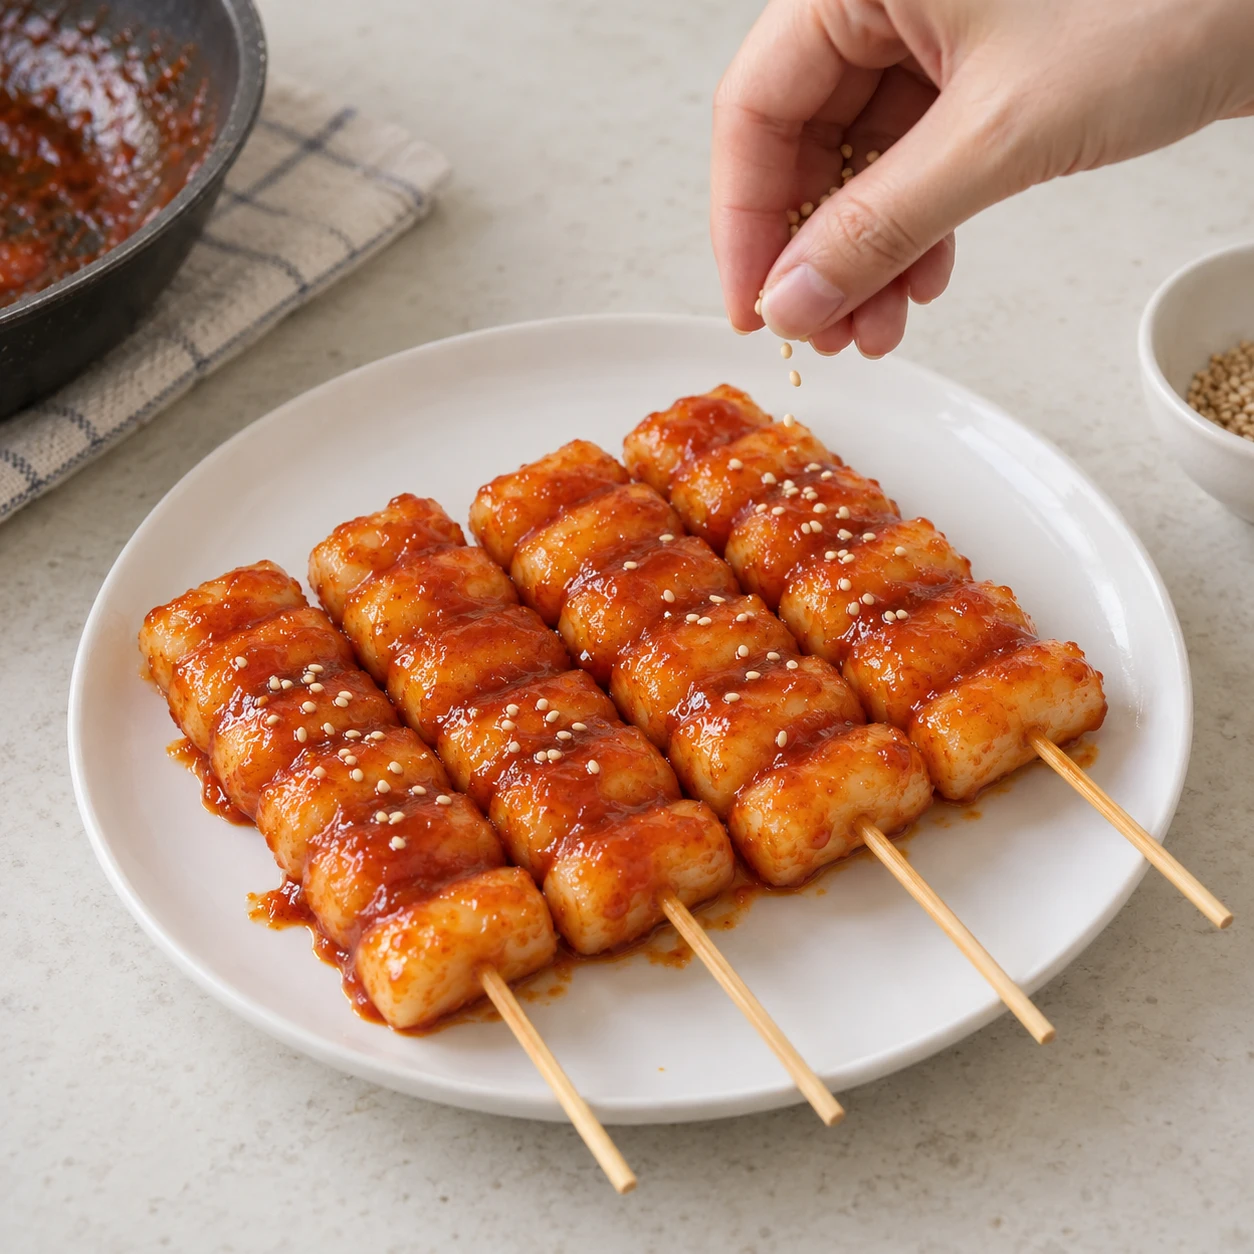
Add the optional sesame seeds and let the skewers cool briefly until comfortable to eat. Serve while the outside is still crisp and the center is soft. For someone new to rice cakes, start with a small bite and explain that the texture is chewy rather than like bread.
Finished dish
This is the classic sweet, slightly spicy street-food version. The separate soy-sauce recipe has its own milder seasoning; swapping sauces is more reliable than guessing how much chili to remove. Use a small 180 ml paper cup, a level eating spoon of about 15 ml and a small teaspoon of about 5 ml. Household quantities are approximate; use the same cup and spoons throughout. Packet fractions refer to the labeled packet size, not to an unknown bag. Wooden skewers are optional equipment: choose short ones that fit flat in your pan, or cook the pieces loose and coat them in the sauce. Remove skewers before giving a portion to a child. Rice cakes are very chewy; they are not appropriate for babies or children who cannot chew them safely. Best freshly cooked: the rice cakes become firm as they cool. Refrigerate leftovers in a shallow covered container within 2 hours, or within 1 hour if the room is above 32°C. Keep at 4°C or colder and use within 3–4 days. Reheat cooked leftovers until hot throughout, reaching 74°C if measured.